Share with your friends!
Apple pie is one of my favorite desserts ever and I just recently realized that I’ve never posted my apple pie recipe on my blog! I was planning to make a pie because I had a bunch of apples I needed to use up because they were going bad and then I realized the first day of Fall was coming up and I thought it would be a perfect time to blog it! I’m so glad I did because this was probably the best pie I’ve ever made – no joke. Jesse and I both looked at each other like that was a perfect pie. The funny thing is, I really didn’t think it would turn out because of the apples! Do you do that too? I love apples but I sometimes forget they’re in the bottom crisper and then I open it and realize there’s a bunch of apples in there that are no longer tasty to eat raw. The solution is always apple pie!
The thing about apple pie is that a recipe really isn’t necessary. Use this to guide you and then after that, make it your own! Years ago when I asked my mom for her apple pie recipe she said she didn’t have a recipe and just added a little of this and a little of that. So I sort of figured out a recipe and wrote it down so that way we actually had something written down to come back too.
I very rarely stray from this “recipe” for apple pie.. I like to stick to what I know, because when I have strayed it never was as good to me. I think apple pie is one of those things that no matter how many recipes you try, you’ll always come back to your childhood recipe because of the memories that come with it.
PIE CRUST
Pie dough can be intimidating, but it’s really not that hard. Sure, I had to practice a few times and I still have moments where my crust isn’t as good as other times, but it’s definitely not something to avoid. There are a million and one different pie crust recipes out there that promise to be the best one you’ve ever had… but honestly, pie crust is pie crust and it all tastes pretty similar to me. I like this recipe because it’s the same one that my mom always uses and the one I grew up eating.
I recently tried The Pioneer Woman’s pie crust recipe and it was good, but tasted like my recipe and required several more ingredients; I like my recipe because it’s super easy to remember with only a few ingredients. My mom told it to me once and I’ve never forgotten it, although I have upped the recipe so that it makes more dough because it never seemed to make quite enough for me.
Measure out the flour in a large bowl and add in your butter flavored shortening. I think this is where my moms recipe is super unique compared to almost every other recipe out there, she uses butter flavored shortening and not regular butter or vegetable shortening.
Use a pastry cutter and cut the butter into the flour. Most recipes will call for super cold butter, but since this is shortening it won’t be cold, I’ll explain the cold element in a second. You’ll want the mixture to look like coarse crumbs.
Now add in a good amount of salt and taste. Have you ever tasted pie crust dough? I love it, mostly because it reminds me of my childhood I think, because it really is plain tasting. But this is the key ingredient to me.. taste testing the dough. If you don’t taste it you won’t know exactly how much salt you need. The salt really brings out the flavor in the dough.
Add in your ice cold water, this is obviously the cold element. While you’re mixing the flour and shortening, have a few ice cubes sitting in a cup of water to chill. Drizzle in a little bit of the water at a time and mix it in with a rubber spatula. The other thing to be careful of is over mixing the dough. The less you touch it, the better. The dough will come together but still be just slightly tacky. When I make pie crust dough my flour and butter shortening are always the same amount, but my salt and water vary every time.
Cut the dough in half and roll out each half, one at a time. You’ll want to lightly flour your surface and also your rolling pin. Roll the dough into a circle and make sure it’s big enough to fit in your pie pan. Using your rolling pin, roll the dough onto the pin so you can transfer it to your pie pan. Fit it into the bottom and tuck in any extra edges, then cover with plastic wrap.
Repeat with the second half of dough and lay it over the top of the plastic wrapped bottom piece, then cover the whole thing with plastic wrap and stick into the fridge. You want to keep the dough cool, so keep it in the fridge until your apples are ready to go in.
PIE FILLING
My favorite apples to use for an apple pie have always been Gala apples. I’ve done Granny Smith Apples before and I don’t care for them in a pie. Either way, my magic number is always 6 apples. I don’t really like my pie to be any thicker or thinner than that.
All the apples will need to be peeled and cored. I like to peel them, then cut the apples into quarters, remove the core then I slice them into equal sized slices. If you want the pie to cook evenly then all the apples need to be similar thickness. But don’t go crazy with this, just cut the apples. That’s my motto in the kitchen… don’t over think it, just do it.
Once all your apples are sliced, put them in a large bowl and pour in all the goodness. The sugar, the flour, the cinnamon and the nutmeg. If you want to add ground cloves, you can add a pinch of that as well. Toss all the apples to make sure they are all coated evenly. Then taste.. again, tasting is super important to make sure it’s flavored right. If the apples don’t taste sweet enough or don’t seem to have enough cinnamon then add more of what you need. If you’re wondering about the flour, it needs to be added to the apples because apples are super juicy and they’ll let off all their juices and make a pool in the bottom of the pie pan if you don’t add the flour.
Pull out the crust from the fridge and remove the top layer and set aside. Pour the apples into the pie dish on the bottom crust and smooth out to fit evenly. Take about 2 tablespoons of butter and cut into cubes and lay around the apples.
Then take the second crust and lay on top. Now, if there’s a lot extra you can cut some of it off, which I did in this case because I did have quite a bit hanging over. But I like to tuck the crust in and under because you can never have too much crust. Then crimp the crust so it’s sealed.
I’m not an artistic person so I never get fancy with my top pie crust, but have fun with it if you want! Sprinkle a bunch of sugar over the top, this will give it a nice sugary and crunchy top coating. Cut a few slits into the crust, plop onto a baking sheet, cover with foil and stick into your oven.
The oven needs to be pre-heated at 350*F. Bake it for 45 minutes with the foil, then remove the foil, and bake another 30 minutes. All done!
Your house will smell amazing while this is baking. And make sure you bake your pie on a baking sheet because there will probably be juicy apple drippings and if they fall onto your oven they will burn, and then your house will be smoky. Yes, I know this from experience.. oops!
Let the pie cool just a little, then slice up, serve with vanilla bean ice cream and enjoy! Ooh, maybe add a nice cup of hot coffee to that as well!
Can you see why this is one of my favorite things to make?? Look at that gloriousness! The crust on this pie was perfect.. it was flaky and buttery and the sugar coating over the top was so perfect and crunchy. The apples were perfectly spiced and sugared… quite literally the perfect slice of pie.
I hope you’ll make this soon!
Enjoy!
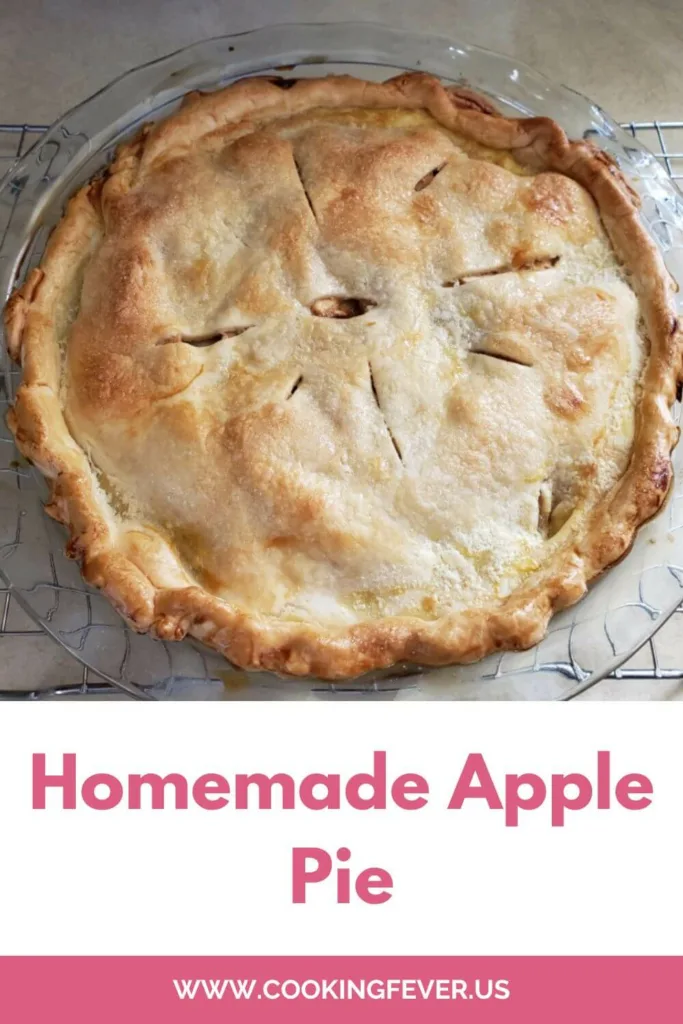
Homemade Apple Pie
Ingredients
Crust
- 3 cups all-purpose flour
- 1-1/2 cups butter flavored shortening
- 1 - 1-1/2 tsp salt
- 1/2-1 cup ice water
Filling
- 6 apples peeled and cored, medium/large size
- 1 cup white sugar
- 1/4 cup flour
- 1 T + 1 tsp. cinnamon
- 1/2 tsp nutmeg
- 2 T white sugar for pie dough topping
Instructions
- Add the flour and shortening to a mixing bowl and using a pastry cutter, cut the shortening into the flour until it resembles course crumbs. Add in the salt and taste.
- Pour in a little of the ice water, about 1/2 cup then mix with a rubber spatula. Add just a little more water at a time until the consistency is tacky but not dry or sticky.
- Split dough in half. Flour your surface and rolling pin, and roll out a large circle. Roll the dough onto the rolling pin and transfer to your pie dish. cover with plastic wrap, then repeat with the second pie crust. Cover the whole thing with plastic wrap and put into fridge.
- Slice all your apples into equal sizes and add them to a large bowl. Pour in the sugar, flour, cinnamon and nutmeg. Toss so that all the apples are evenly coated. And of course, taste and adjust if necessary.
- Pour the apples into the bottom pie crust layer then cover with the top crust. Cut off extra dough or tuck under and crimp edges. Sprinkle sugar over the top, make a few slits into the bake.
- Cover pie with foil and put onto a baking sheet and bake for 45 min, then remove foil and bake an additional 30 minutes.