Share with your friends!
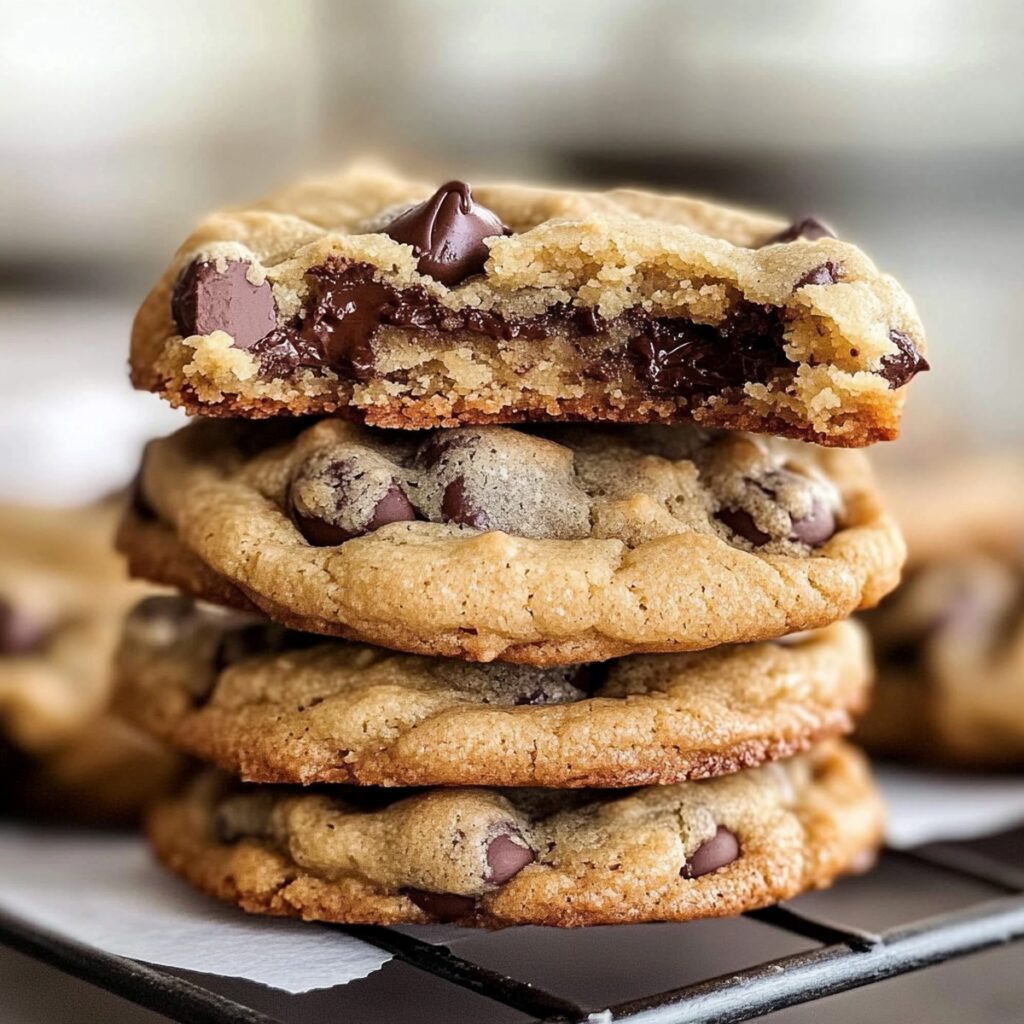
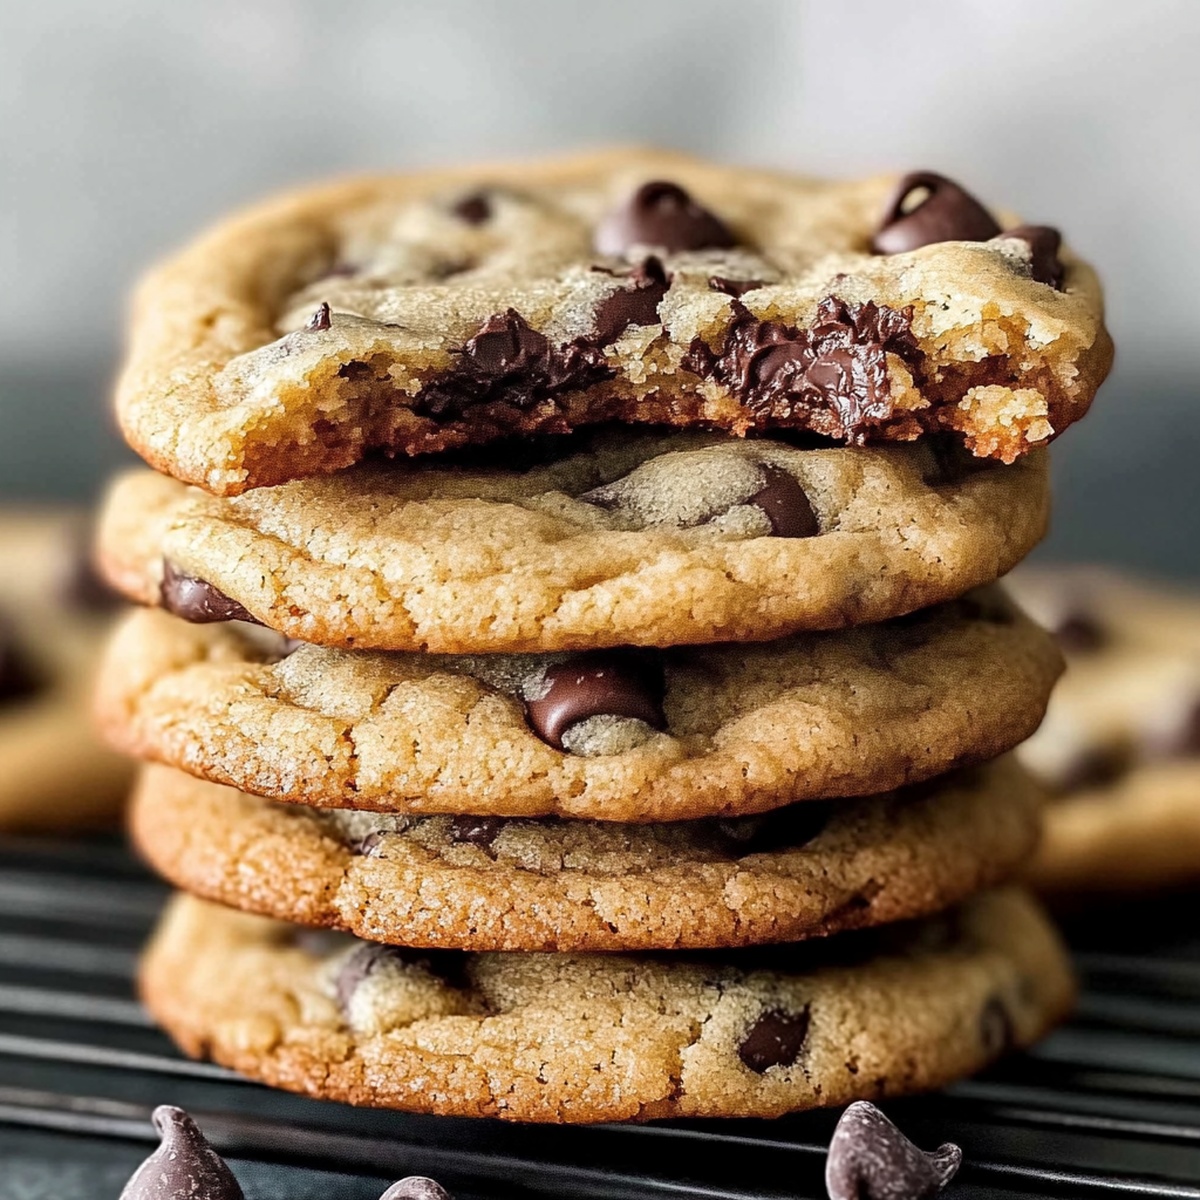
There’s a certain magic in making Chewy Chocolate Chip Cookies from scratch—one that quietly unfolds as simple ingredients come together and transform in your own kitchen. It starts with the earthy aroma of flour, the rich notes of brown sugar, and the faint, nutty scent of vanilla wafting through the air. As I measure and mix, I can feel the anticipation rising; these aren’t just any cookies, they’re a celebration of the joy of creation—soft, golden, with those gooey pockets of chocolate that make each bite unforgettable.
When the melted butter meets the sugar, there’s a satisfying smoothness as the whisk glides through the bowl. The chocolate chips are scattered in, and suddenly the dough looks lively and inviting—thick, shiny, flecked with little gems of chocolate. Even before the Chewy Chocolate Chip Cookies bake, I can sense how these cookies have the power to bring people together. The time spent letting the dough chill becomes anticipation, a promise that something delicious is waiting just around the corner.
As the first tray hits the heat, the kitchen fills with the scent of toasting flour and caramelizing sugar. It’s cozy and enveloping, almost therapeutic. When I pull the cookies out, edges lightly golden and centers pillowy, I can’t resist sneaking one right off the rack. There’s a chewy give as I break it in half and warm chocolate stretches in silky ribbons. These Chewy Chocolate Chip Cookies are a reminder of how comforting and nourishing a simple, homemade treat can be—especially when shared with friends or family over laughter, coffee, or a cozy evening chat.
What I love most is that making this recipe isn’t just about the end result. It’s about the process—choosing quality ingredients, savoring each step, and knowing that you’ve turned pantry basics into something extraordinary. Whether you’re hosting a casual get-together or need a crowd-pleasing dessert, these cookies are proof that the best moments often come from the joy of creation.
A Taste of Inspiration: How to Make Chewy Chocolate Chip Cookies
Click here to get printable version
Gathering Your Ingredients
- 2 1/4 cups (281g) all-purpose flour, spooned and leveled
- 1 1/2 teaspoons cornstarch
- 1 teaspoon baking soda
- 1/2 teaspoon salt
- 3/4 cup (170g) unsalted butter, melted and cooled for 5 minutes
- 3/4 cup (150g) packed light or dark brown sugar
- 1/2 cup (100g) granulated sugar
- 1 large egg, plus 1 egg yolk, at room temperature
- 2 teaspoons pure vanilla extract
- 1 1/4 cups (225g) semi-sweet chocolate chips or chunks
The Method
- In a large bowl, whisk together the flour, cornstarch, baking soda, and salt until there are no streaks. This ensures every cookie bakes up evenly.
- In a medium bowl, combine the melted (but not hot) butter with the brown sugar and granulated sugar. Whisk until completely smooth and no lumps remain. Add the egg and extra yolk, whisking until the mixture is glossy and cohesive. Stir in the vanilla extract.
- Pour the wet ingredients into the dry mixture. With a spatula or large spoon, gently fold until just combined—don’t overmix. The dough will be soft, thick, and slightly shiny. Fold in the chocolate chips; they may not stick easily at first due to the melted butter, but keep mixing gently until evenly distributed.
- Cover the bowl tightly with plastic wrap and chill the dough in the refrigerator for at least 2 hours (overnight is even better). This rest time helps prevent the cookies from spreading too much and deepens their flavor.
- Preheat your oven to 325°F (163°C). Line baking sheets with parchment or silicone mats. If your dough chilled longer than 2 hours, let it sit out for about 15 minutes so it’s easier to shape.
- Using a cookie scoop or tablespoon, portion the dough into 2-ounce (60g) balls for extra-large cookies or 1.75-ounce (50g) balls for medium-large. Roll each ball gently in your hands, then shape them so they’re taller than they are wide (like a mini cylinder). This helps the cookies stay thick and chewy.
- Place the dough balls at least 3 inches apart on the baking trays. Bake for 13–14 minutes, until the edges are just golden and the centers still look slightly underbaked. Don’t overbake—the cookies will firm up as they cool.
- Let the cookies cool on the baking sheet for 10 minutes (they’ll finish setting up), then transfer to a wire rack to cool completely. If you’d like, gently press a few extra chocolate chips onto the tops while they’re warm for a bakery-style finish.
- Store cooled cookies in an airtight container at room temperature for up to one week. Enjoy every chewy, chocolatey bite!
Finding the Best Ingredients (and Smart Substitutions)
Quality matters when it comes to Chewy Chocolate Chip Cookies. I recommend using unbleached, all-purpose flour and a mix of light and dark brown sugar for deep, caramel notes. Seek out chocolate chips with at least 60% cocoa for a richer flavor and antioxidants. If you’re dairy-free, swap in melted coconut oil or a plant-based butter alternative. For a whole-grain boost, try substituting up to half the flour with whole wheat pastry flour. And if you’re egg-free, a flax egg (1 tablespoon ground flaxseed mixed with 2.5 tablespoons water) can work in a pinch—just note the texture may be slightly less chewy.
How It’s Traditionally Served (or How I Love to Serve It)
There’s nothing more welcoming than a plate of warm Chewy Chocolate Chip Cookies at the center of a gathering. I love serving them slightly warm, stacked on a rustic board or arranged in a basket lined with a cloth napkin. For a casual party, offer a “cookie bar” with small bowls of fruit, nuts, and even a scoop of Greek yogurt or vanilla ice cream on the side. Or, for a healthier presentation, slice fresh strawberries and scatter them around the platter—the tartness plays beautifully with the sweet, melty chocolate. Individual parchment wraps also make them easy to grab at larger events.
Storing This Dish to Preserve Its Story
Once cooled, these Chewy Chocolate Chip Cookies keep well at room temperature in an airtight container for up to a week. If you want to stretch out the joy, freeze portioned dough balls on a tray until firm, then transfer to a zip-top bag and freeze for up to 3 months. Bake straight from frozen, adding 1–2 minutes to the bake time, for fresh cookies whenever you crave them. To revive cookies that have gone a little stale, a quick 10-second zap in the microwave brings back that irresistible chewiness.
Tips for a Truly Memorable Flavor
The secret to unforgettable Chewy Chocolate Chip Cookies lies in small, mindful tweaks. Chilling the dough is non-negotiable—it gives the flour time to hydrate and the flavors to meld. For extra depth, try browning the butter before mixing (cool it fully before using). A sprinkle of flaky sea salt right after baking enhances both the chocolate and overall sweetness. Don’t skimp on quality vanilla extract, and for a lighter touch, you can reduce the sugar by up to 1/4 cup without sacrificing texture or taste.
Regional & Seasonal Variations of Chewy Chocolate Chip Cookies
Across the world, bakers put their own spin on the classic Chewy Chocolate Chip Cookie. In the Northeast, a dash of molasses is sometimes added for extra chew. In California, you might find versions loaded with walnuts or dried cherries for a fruit-and-nut twist. Around the holidays, consider stirring in a pinch of cinnamon or orange zest. For a summer treat, swap half the chocolate chips for chopped dried apricots or coconut. Let the seasons and your pantry inspire your creation!
Common Questions Answered
Why do my cookies always turn out flat?
Flat cookies usually mean your dough was too warm or not chilled long enough. Chilling the dough is essential—it allows the butter to solidify, preventing excessive spread in the oven. Also, make sure to measure your flour properly (spoon and level, don’t scoop) to avoid too little structure. If your kitchen is particularly warm, try chilling the shaped dough balls for 10 extra minutes before baking.
Can I use bread flour or cake flour instead of all-purpose?
You can, but the texture will change. Bread flour will produce a chewier, more substantial cookie due to its higher protein content, while cake flour yields a softer, more delicate crumb. If you experiment, try substituting only half the flour first to see which texture you prefer. Stick to all-purpose flour for the classic chewy bite this recipe is known for.
What’s the science behind adding cornstarch?
Cornstarch is a key ingredient for soft and chewy cookies. It binds with the liquids in the dough, keeping the cookies moist and tender after baking. This also helps create a satisfyingly dense center without becoming cakey. Skip the cornstarch, and you’ll likely end up with a drier, crispier cookie.
How do I know when the cookies are done if the centers look underbaked?
Trust your eyes and a gentle touch. The edges should look lightly golden, while the centers will appear a little soft and glossy. Remove the cookies at this stage; they’ll continue to set as they cool on the tray, becoming perfectly chewy. Overbaking is the most common way to lose that soft texture, so err on the side of underdone when in doubt.
Can I add mix-ins like nuts or dried fruit?
Absolutely! Chewy Chocolate Chip Cookies are endlessly adaptable. Add up to 1 cup of chopped nuts (like walnuts or pecans) or dried fruits (like cranberries or cherries) along with the chocolate chips. Be careful not to overload—the dough can only handle so much before the cookies lose their shape.
Is there a trick to making cookies the same size?
Using a cookie scoop is the best way to portion uniform dough balls, which ensures even baking. If you don’t have a scoop, weigh each dough ball on a kitchen scale. Shape each one into a cylinder, as described, for thick, bakery-style cookies with a consistent look.
Chewy Chocolate Chip Cookies
Equipment
- Baking sheets
- Mixing bowls
- whisk
- plastic wrap
- Cookie Scoop
Ingredients
- 2 1/4 cups all-purpose flour spooned and leveled
- 1 1/2 teaspoons cornstarch
- 1 teaspoon baking soda
- 1/2 teaspoon salt
- 3/4 cup unsalted butter melted and cooled for 5 minutes
- 3/4 cup light or dark brown sugar packed
- 1/2 cup granulated sugar
- 1 large egg plus 1 egg yolk at room temperature
- 2 teaspoons pure vanilla extract
- 1 1/4 cups semi-sweet chocolate chips or chunks
Instructions
- In a large mixing bowl, whisk together the flour, baking soda, cornstarch, and salt. Set aside this dry mixture.
- In another bowl, blend the melted butter with both sugars until smooth. Beat in the egg and yolk, then incorporate the vanilla extract, resulting in a thin and shiny mix.
- Combine the wet ingredients into the dry mix, folding gently until just incorporated. The resulting dough should be shiny, soft, and somewhat thick. Add the chocolate chips and carefully mix them in.
- Wrap the dough securely in plastic wrap and place it in the refrigerator for at least 2 hours, or up to 3 days. Overnight chilling is recommended for optimal results.
- Preheat the oven to 325°F (163°C) and prepare baking sheets with parchment or silicone liners. If dough has been chilled longer than 2 hours, allow it to sit at room temperature for 15 minutes before shaping.
- Scoop out portions of dough weighing roughly 2 ounces for large cookies or about 1.75 ounces for medium ones. Form them into balls and slightly elongate them to maintain thickness while baking, spacing them 3 inches apart on the trays.
- Bake for 13 to 14 minutes, until the edges turn a light golden brown while the centers remain soft. Allow cookies to cool on the baking sheet for about 10 minutes before transferring them to a wire rack to cool completely. Optionally, press a few extra chocolate chips on top of the warm cookies for added appeal.
- Store cooled cookies in an airtight container at room temperature for up to one week, if they manage to last that long!