Share with your friends!
Peanut butter cookies have always been a staple in my kitchen. Growing up, I remember my mom baking these delightful treats every Sunday afternoon. The smell of freshly baked cookies would waft through the house, drawing everyone to the kitchen like bees to honey. Those days, the kitchen was more than just a place to cook; it was a warm hub where stories were shared, laughter was exchanged, and the delicious aroma of peanut butter cookies enveloped us all.
I’ve carried on this tradition with my family, and now my kids eagerly await cookie day. These peanut butter cookies are a breeze to make, often disappearing before they even have a chance to cool. With just three simple ingredients, this recipe is perfect for spontaneous baking cravings or when you want to whip up a quick treat without much fuss. It’s amazing how something so simple can bring so much joy and satisfaction.
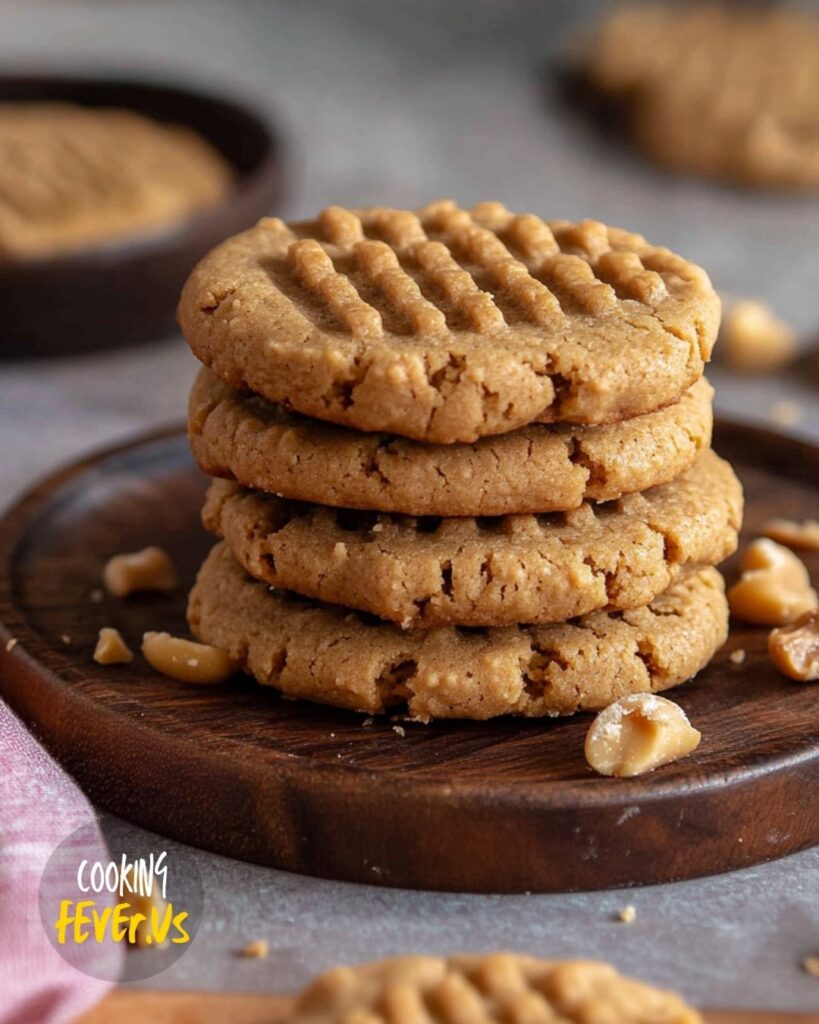
There’s something truly special about the combination of peanut butter and sugar that’s both comforting and indulgent. Adding a criss-cross pattern on top using a fork was one of my mom’s little tricks, and it’s now a beloved part of the cookie-making ritual. It adds a bit of fun and gives the cookies that classic homemade look.
So, if you’re looking to make some cherished memories in your kitchen or simply need a quick sweet fix, these peanut butter cookies are sure to please. Go ahead, gather your ingredients, and let’s make some magic happen in the kitchen!
How to Make Peanut Butter Cookie Bliss
Click here to get printable version
Ingredients:
- 1 cup peanut butter
- ½ cup sugar
- 1 egg
Directions:
- First, preheat your oven to 350ºF (180ºC) to make sure it’s nice and hot for baking.
- In a large mixing bowl, combine the peanut butter, sugar, and egg. Stir until the mixture is smooth and well blended.
- Scoop a spoonful of the dough and roll it into a ball with your hands. Place it on a nonstick baking sheet.
- For added flair, press down on the dough balls with a fork, creating a criss-cross pattern on each cookie.
- Bake the cookies in the preheated oven for 8-10 minutes, or until their bottoms turn crispy and golden brown.
- Allow the cookies to cool on the baking sheet for a few minutes before removing them to enjoy.
No Peanut Butter? Try These Alternatives
If you’re out of peanut butter or prefer something different, almond butter or sunflower seed butter make excellent substitutes. Both will provide a similar texture and nutty flavor. For a nut-free version, consider using cookie butter or tahini, depending on your taste preference.
Best Ways to Store Peanut Butter Cookie Bliss
Keep your peanut butter cookies fresh by storing them in an airtight container at room temperature. They should last for about a week. If you want to extend their shelf life, you can freeze them. Just layer the cookies between sheets of parchment paper and place them in a freezer-safe bag or container.
Making the Most of Peanut Butter Cookie Bliss: Serving Ideas
These cookies are delightful on their own, but you can elevate your experience by serving them with a cold glass of milk or a scoop of vanilla ice cream. For a special touch, drizzle some melted chocolate over the top or dust with powdered sugar for a bit of extra sweetness.
Cooking Hacks to Elevate Peanut Butter Cookie Bliss
To get the absolute best out of your cookies, use creamy peanut butter for a smoother texture, or try chunky peanut butter for added crunch. For an extra flavor boost, add a splash of vanilla extract or a pinch of sea salt to your dough. Ensure that you don’t overbake them for the perfect chewy center.
Seasonal Twists for Peanut Butter Cookie Bliss
In summer, add a hint of coconut flakes to your dough for a tropical twist. During fall, a sprinkle of cinnamon or pumpkin spice can bring a comforting warmth. Chocolate chips or chopped nuts added during the winter can make your cookies even more indulgent.
 FAQs:
FAQs:
Can I use natural peanut butter for these cookies?
Yes, you can use natural peanut butter, but be aware that it might affect the texture slightly as it tends to separate. Ensure you stir the natural peanut butter thoroughly before incorporating it into the recipe for the best results.
How can I make these cookies gluten-free?
This recipe is naturally gluten-free since it doesn’t include any flour. However, always check the labels on your ingredients to make sure they are certified gluten-free, especially if you’re serving someone with a gluten intolerance.
Is there a way to reduce the sugar content?
You can reduce the sugar content by using a sugar substitute like erythritol or stevia. Keep in mind that this may alter the overall sweetness and texture of the cookies, so adjust according to your taste preferences.
Can I add chocolate chips to this recipe?
Absolutely! Chocolate chips can be a delightful addition to these cookies. Simply fold a handful into the dough before forming the cookie balls. This will add a rich, chocolatey flavor that complements the peanut butter perfectly.
How do I know when the cookies are done baking?
You’ll know the cookies are done when the bottoms are crispy and golden brown. They should appear set on the edges but still slightly soft in the center. Remember, they will continue to firm up as they cool on the baking sheet.
What should I do if the dough is too sticky?
If the dough is too sticky to handle, you can refrigerate it for about 15-20 minutes before forming the balls. This will make the dough easier to work with and help maintain the shape of the cookies as they bake.

Peanut Butter Cookie Bliss
Equipment
- baking sheet
Ingredients
- 1 cup peanut butter
- 1/2 cup sugar
- 1 egg
Instructions
- Preheat your oven to 350ºF (180ºC).
- In a large bowl, combine the peanut butter, sugar, and egg until the mixture is smooth and well blended.
- Scoop a portion of the dough, roll it into a small ball, and place it on a nonstick baking sheet.
- For added flair, flatten the cookie balls with a fork, creating a criss-cross design on top.
- Bake in the oven for 8 to 10 minutes, or until the bottoms are golden and crisp.
- Allow the cookies to cool on the baking sheet for a few minutes before indulging in your tasty creations!