I. Introduction
When it comes to cooking and baking, accurate measuring is essential for achieving the desired results. Whether it’s adding the right amount of sugar to a recipe or measuring the correct amount of baking powder, small deviations can make a big difference in the final product. While there are various measuring tools available, teaspoons are a common and important component in many recipes. In this blog post, we will explore how to measure a teaspoon accurately, the different types of teaspoons, and common mistakes to avoid when measuring. We will also cover how to convert teaspoons to other units, as this is often necessary when following recipes from different regions. With the right techniques and tools, measuring teaspoons can be a simple and precise process.
A. Explanation of the importance of accurate measuring
Accurate measuring is crucial in cooking and baking for several reasons. Firstly, it ensures that the recipe’s ingredients are in the correct proportions, which is necessary for achieving the desired flavor, texture, and consistency. Secondly, accurate measuring helps to prevent costly mistakes, such as using too much or too little of an ingredient, which can result in a ruined dish or baked goods. Thirdly, precise measuring allows for consistent results, which is especially important when preparing large batches of food or when cooking professionally. Inaccurate measuring can lead to unpredictable outcomes, making it difficult to replicate the same recipe with consistent results. Overall, accurate measuring is an important skill for any cook or baker to master to ensure the success of their culinary endeavors.
B. Brief overview of measuring tools
There are several measuring tools available for use in cooking and baking, each with its own unique purpose. Here are some common measuring tools:
- Measuring cups: Measuring cups are used to measure dry ingredients such as flour, sugar, and spices. They come in sets of varying sizes, typically from 1/4 cup to 1 cup, and are made from materials such as plastic, metal, or glass.
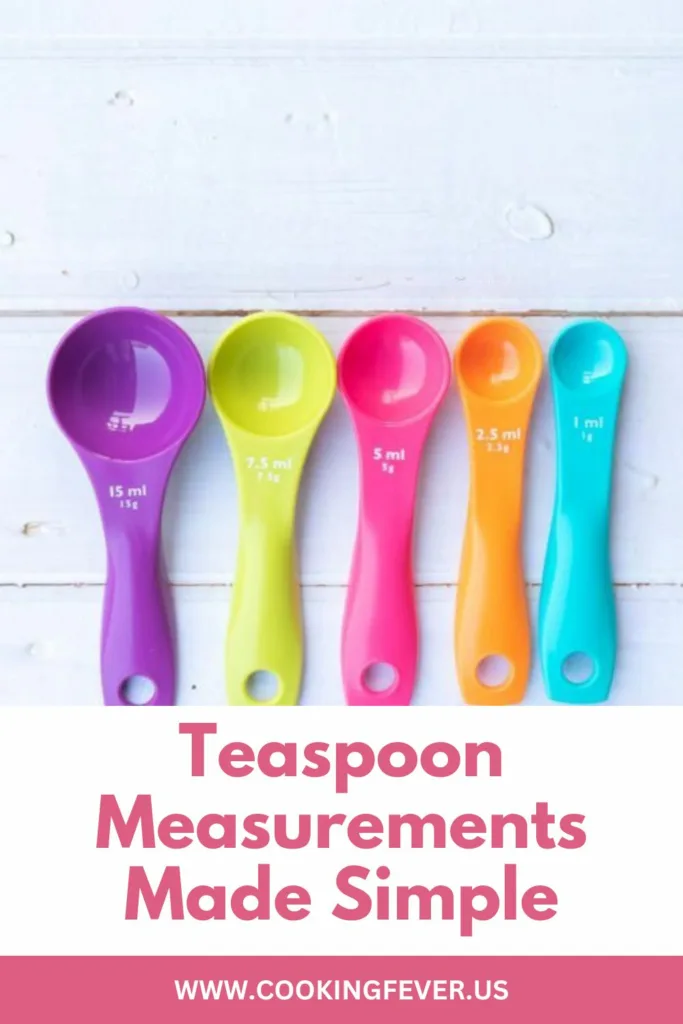
- Measuring spoons: Measuring spoons are used to measure both dry and liquid ingredients. They come in sets of varying sizes, typically including 1/4 teaspoon, 1/2 teaspoon, 1 teaspoon, and 1 tablespoon. Measuring spoons can be made from materials such as plastic, metal, or stainless steel.
- Kitchen scales: Kitchen scales are used to measure both dry and liquid ingredients by weight. They are especially useful when precise measurements are required, such as in professional baking or when working with unfamiliar ingredients.
- Liquid measuring cups: Liquid measuring cups are used to measure liquid ingredients such as milk, water, and oil. They typically have a spout and are marked in ounces, milliliters, and cups.
- Measuring pitchers: Measuring pitchers are similar to liquid measuring cups but have a larger capacity and are often used for measuring larger quantities of liquid ingredients.
- Eyeballing: While not a tool per se, eyeballing is a method of estimating measurements without using measuring cups or spoons. It is not recommended for precise recipes or when accuracy is essential, but it can be a useful technique for quick and simple recipes.
C. Focus on teaspoons and their common uses
Teaspoons are a commonly used measuring tool in cooking and baking. They come in various types and are used to measure both dry and liquid ingredients. Here are some common uses of teaspoons in the kitchen:
- Measuring spices: Teaspoons are often used to measure spices such as cinnamon, nutmeg, and cloves. These ingredients are typically used in small quantities, and teaspoons provide a precise way to measure them.
- Adding sweeteners: Teaspoons are also commonly used to measure sweeteners such as sugar, honey, and syrup. Again, these ingredients are often used in small quantities, making teaspoons a useful tool for precise measuring.
- Measuring baking powder and baking soda: Baking powder and baking soda are leavening agents used in baking. They need to be measured accurately to ensure that the baked goods rise properly. Teaspoons are often used to measure these ingredients.
- Adding extracts: Extracts such as vanilla, almond, and lemon are used to add flavor to baked goods. Teaspoons are commonly used to measure these ingredients, as they are typically added in small amounts.
- Measuring liquid ingredients: While teaspoons are primarily used for measuring dry ingredients, they can also be used to measure small amounts of liquid ingredients such as vanilla extract or lemon juice.
II. How to Measure a Teaspoon
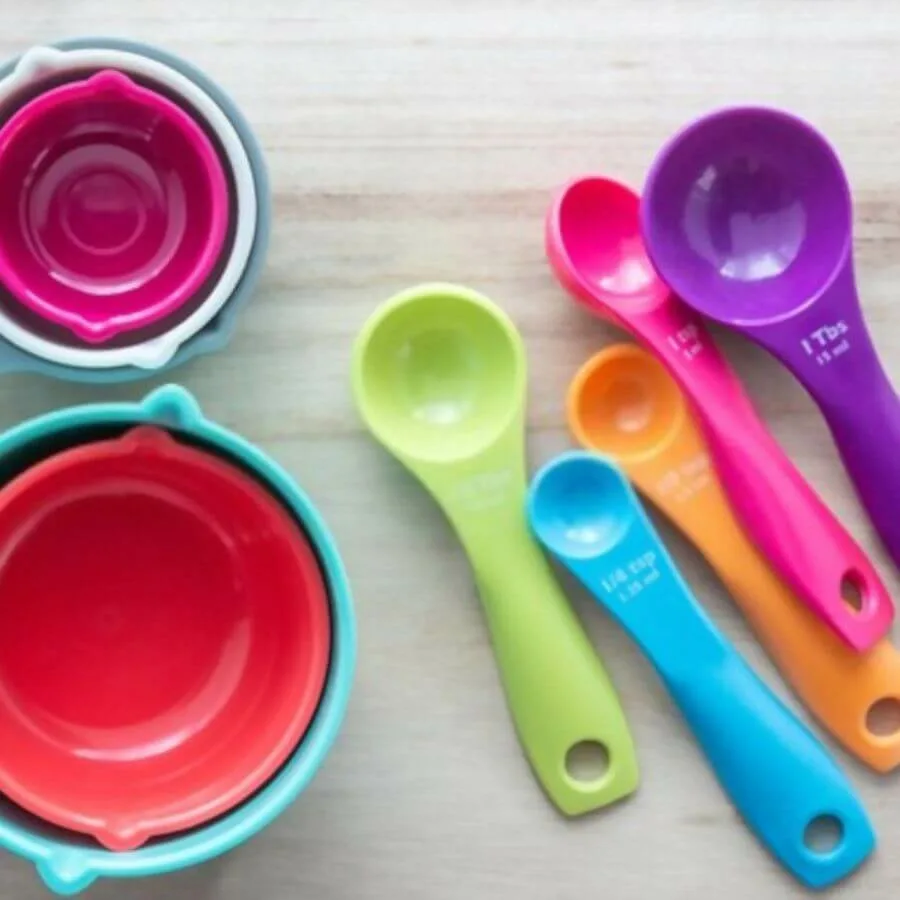
A. Explanation of the different types of teaspoons
There are several types of teaspoons available, each designed for different purposes. Here are some of the most common types of teaspoons:
- Standard teaspoon: This is the most common type of teaspoon used for stirring tea, coffee, or other beverages. It has a rounded bowl-shaped head and a short handle, typically measuring between 4 and 6 inches in length.
- Dessert spoon: This type of spoon is slightly larger than a standard teaspoon, with a longer handle and a wider bowl-shaped head. It is commonly used for eating desserts and other sweet treats.
- Coffee spoon: A coffee spoon is smaller than a standard teaspoon, with a shorter handle and a smaller bowl-shaped head. It is designed for stirring sugar, cream, or other additives into a cup of coffee.
- Demitasse spoon: This type of spoon is even smaller than a coffee spoon, with a narrow bowl-shaped head and a short handle. It is commonly used for serving espresso, Turkish coffee, or other small, strong drinks.
- Iced tea spoon: An iced tea spoon is longer than a standard teaspoon, typically measuring between 7 and 8 inches in length. It is designed for stirring sweeteners and other additives into tall glasses of iced tea or other cold beverages.
- Chinese teaspoon: A Chinese teaspoon is smaller than a standard teaspoon, with a longer handle and a narrower bowl-shaped head. It is commonly used in Chinese cuisine for serving and consuming small portions of food.
- Grapefruit spoon: A grapefruit spoon has a serrated edge on the bowl-shaped head, which makes it easy to scoop out the flesh of a grapefruit or other citrus fruit.
These are just a few of the many types of teaspoons available. Different cultures and cuisines may have their own unique types of spoons designed for specific purposes.
B. Demonstration of how to properly use a measuring teaspoon
Sure, here’s a step-by-step demonstration of how to properly use a measuring teaspoon:
Start by selecting a measuring teaspoon. It’s important to use a measuring spoon rather than a regular teaspoon from your cutlery set, as the volume can vary significantly between spoons.
Hold the measuring spoon in one hand and the container of the ingredient you want to measure in the other hand. Make sure you have a clear space to work in and that you have enough room to work comfortably.
Using the spoon, scoop up the ingredient you want to measure. Depending on the ingredient, you may need to use a flat edge (such as the back of a butter knife) to level off the spoonful so that it is exactly level with the top edge of the spoon.
Once you have a level spoonful of the ingredient, carefully transfer it to the recipe you are preparing. Try not to spill any of the ingredient as you transfer it.
Repeat this process as needed for the recipe. Depending on the recipe, you may need to measure multiple spoonfuls of the same ingredient, or you may need to measure different ingredients using different spoons.
Once you are finished using the measuring spoon, wash it with soap and water and dry it thoroughly before storing it away.
It’s important to be as precise as possible when using a measuring spoon, as even small variations in the amount of an ingredient can affect the final result of the recipe. By following these steps, you can ensure that you are using a measuring teaspoon properly and accurately measuring your ingredients.
1. Step-by-step guide to measuring dry ingredients
Measuring dry ingredients accurately is crucial in cooking and baking to achieve consistent and delicious results. Here is a step-by-step guide to measuring dry ingredients:
Get the measuring cups and spoons you will need. Depending on the recipe, you may need different sizes of measuring cups and spoons. Ensure that they are clean and dry.
Look at the recipe and determine the amount of the ingredient you need. Make sure you are looking at the correct measurement, whether it’s ounces, grams, or cups.
- Use a spoon or spatula to fluff up the dry ingredient in its container. This will help to prevent clumps and ensure that the measurement is accurate.
- Use the measuring cup or spoon to scoop the dry ingredient into it. Fill the measuring utensil to the top and level it off with a straight edge, such as a knife or the back of a spoon. Be sure not to pack the ingredient down or shake the cup/spoon to settle it.
- Repeat steps 3 and 4 until you have the desired amount of the dry ingredient.
- Pour the measured dry ingredient into the mixing bowl or recipe as directed.
- Repeat the process for each dry ingredient called for in the recipe.
- Clean up any spills or excess ingredients and store the measuring utensils.
Following these steps will help ensure that you measure the correct amount of dry ingredients and achieve the desired results in your cooking and baking.
2. Step-by-step guide to measuring liquid ingredients
Measuring liquid ingredients accurately is essential in cooking and baking, especially when it comes to recipes that require precise ratios of ingredients. Here is a step-by-step guide to measuring liquid ingredients:
- Get a liquid measuring cup. Liquid measuring cups are designed to accurately measure liquids, and they usually have a spout for easy pouring. Choose a measuring cup that can hold the amount of liquid called for in the recipe.
- Place the measuring cup on a level surface. It’s important to use a level surface to ensure an accurate measurement.
- Look at the recipe and determine the amount of the liquid ingredient you need. Make sure you are looking at the correct measurement, whether it’s ounces, milliliters, or cups.
- Pour the liquid into the measuring cup until it reaches the appropriate line. Be sure to pour slowly and stop when you reach the line. The liquid should be level with the line on the measuring cup.
- Check the measurement at eye level. Bend down to be eye level with the measuring cup to make sure the liquid is at the correct level.
- Repeat the process for each liquid ingredient called for in the recipe.
- Pour the measured liquid into the mixing bowl or recipe as directed.
- Clean up any spills or excess liquids and store the measuring cup.
By following these steps, you can measure liquid ingredients accurately and achieve the desired results in your cooking and baking.
3. Tips for accurate measuring
Here are some tips for accurate measuring:
- Use the right tools: Use appropriate measuring tools such as measuring cups, spoons, or kitchen scales depending on the type of ingredient you are measuring.
- Read the recipe carefully: Make sure you understand the units of measurement used in the recipe. For example, some recipes might use metric units like grams or milliliters, while others might use imperial units like ounces or cups.
- Level off dry ingredients: When measuring dry ingredients like flour or sugar, use a straight edge to level off the top of the measuring cup or spoon. This will ensure that you are measuring the correct amount.
- Use the correct technique: When measuring liquids, place the measuring cup on a flat surface and read the measurement at eye level. When measuring dry ingredients, use a scoop or spoon to transfer the ingredient to the measuring cup or spoon and avoid packing it down.
- Double-check your measurements: After measuring, double-check your measurements to make sure you have the correct amount. This is especially important when baking, as even small inaccuracies can affect the outcome of the recipe.
III. Converting Teaspoons to Other Units
A. Explanation of why conversions are necessary
Conversions are necessary because different regions or countries use different units of measurement to express the same quantity. For example, teaspoons, tablespoons, and fluid ounces are commonly used in the United States to measure small amounts of ingredients in cooking and baking. However, in other parts of the world, such as the United Kingdom, Australia, and Canada, the metric system is used, and milliliters (ml) and liters (L) are the standard units of measurement for liquids.
Conversions are also necessary when scaling recipes up or down. For example, if a recipe calls for 1 teaspoon of salt and you want to make a double batch, you will need to convert the measurement to tablespoons or another larger unit to ensure that you add the correct amount of salt.
In addition, conversions can be helpful when comparing nutrition information on food labels, as different brands or products may use different units of measurement to express the same nutrient content. By converting the units to a common measurement, such as grams or milligrams, you can more easily compare the nutrient content of different products.
B. Examples of common conversions:
1. Teaspoons to tablespoons
To convert teaspoons to tablespoons, you need to know that there are 3 teaspoons in 1 tablespoon. So, to convert, simply divide the number of teaspoons by 3. For example:
- 6 teaspoons = 2 tablespoons
- 9 teaspoons = 3 tablespoons
- 15 teaspoons = 5 tablespoons
2. Teaspoons to milliliters
To convert teaspoons to milliliters, you need to know that 1 teaspoon is equal to 5 milliliters. So, to convert, simply multiply the number of teaspoons by 5. For example:
- 2 teaspoons = 10 milliliters
- 5 teaspoons = 25 milliliters
- 10 teaspoons = 50 milliliters
Teaspoons to fluid ounces
To convert teaspoons to fluid ounces, you need to know that 1 fluid ounce is equal to 6 teaspoons. So, to convert, simply divide the number of teaspoons by 6. For example:
- 3 teaspoons = 0.5 fluid ounces
- 9 teaspoons = 1.5 fluid ounces
- 18 teaspoons = 3 fluid ounces
Teaspoons to cups
To convert teaspoons to cups, you need to know that 48 teaspoons are equal to 1 cup. So, to convert, simply divide the number of teaspoons by 48. For example:
- 6 teaspoons = 1/8 cup
- 24 teaspoons = 1/2 cup
- 96 teaspoons = 2 cups
C. Conversion charts and tools for easy reference
Here’s a table of common American measurement units for liquid and dry ingredients, along with their equivalent measurements in teaspoons (tsp), cups (c), tablespoons (tbsp), fluid ounces (fl oz), and milliliters (ml):
Liquid Ingredients:
| Measurement | Teaspoons (tsp) | Tablespoons (tbsp) | Cups (c) | Fluid Ounces (fl oz) | Milliliters (ml) |
|---|---|---|---|---|---|
| 1 teaspoon | 1 | 1/3 | 1/48 | 1/6 | 5 |
| 1 tablespoon | 3 | 1 | 1/16 | 1/2 | 15 |
| 1 fluid ounce | 6 | 2 | 1/8 | 1 | 30 |
| 1/4 cup | 12 | 4 | 1/4 | 2 | 60 |
| 1/2 cup | 24 | 8 | 1/2 | 4 | 120 |
| 1 cup | 48 | 16 | 1 | 8 | 240 |
| 2 cups | 96 | 32 | 2 | 16 | 480 |
Dry Ingredients:
| Measurement | Teaspoons (tsp) | Tablespoons (tbsp) | Cups (c) | Ounces (oz) | Grams (g) |
|---|---|---|---|---|---|
| 1 teaspoon | 1 | 1/3 | 1/48 | 1/6 | 4.7 |
| 1 tablespoon | 3 | 1 | 1/16 | 1/2 | 14.2 |
| 1/4 cup | 12 | 4 | 1/4 | 1.75 | 49.6 |
| 1/2 cup | 24 | 8 | 1/2 | 3.5 | 99.2 |
| 1 cup | 48 | 16 | 1 | 7 | 198.4 |
| 2 cups | 96 | 32 | 2 | 14 | 396.8 |
Note that these conversions are approximate and may vary slightly depending on the specific ingredient and how it is packed or measured. Additionally, it’s important to note that measuring ingredients by weight (in grams or ounces) can often be more accurate and consistent than measuring by volume.
Some examples:
- Online Conversion: This website offers a comprehensive range of conversion tools for various units of measurement, including teaspoons to other units. It also includes charts and tables for quick reference.
- The Spruce Eats: This website offers a handy conversion chart for common kitchen measurements, including teaspoons to tablespoons, cups, and milliliters.
- Convert-me.com: This website offers a range of conversion tools, including a teaspoon to milliliter converter, as well as conversion charts for various units of measurement.
- UnitConverters.net: This website offers a simple and easy-to-use conversion tool for teaspoons to milliliters, as well as many other unit conversions.
- Apps: There are also many apps available for smartphones and tablets that offer conversion tools and charts for easy reference. Some popular ones include Unit Converter Ultimate, ConvertPad, and Convert Any Unit.
IV. Conclusion
A. Summary of key points
Teaspoons are a common unit of measurement used for small amounts of ingredients in cooking and baking.
Conversions are necessary when using different units of measurement or when scaling recipes up or down.
Common conversions include teaspoons to tablespoons, milliliters, fluid ounces, and cups.
Online conversion tools, conversion charts, and apps can be used for easy reference.
B. Importance of understanding conversions
Understanding conversions is important for accurate and consistent cooking and baking, as well as for comparing nutrition information on food labels. It can also be helpful when traveling to different countries where different units of measurement are used. By having a basic understanding of conversions, it becomes easier to follow recipes and make adjustments when necessary.
C. Final thoughts and encouragement to try out new recipes using proper measuring techniques.
In conclusion, understanding conversions and using proper measuring techniques is essential for successful cooking and baking. It may seem overwhelming at first, but with practice and the right resources, anyone can become proficient in measuring ingredients accurately and converting between units of measurement.
Trying out new recipes can be a fun and rewarding experience, but it’s important to follow the instructions carefully and use the correct measurements. By doing so, you can ensure that your dishes turn out as intended and avoid any potential mistakes or disappointments.
So, I encourage you to continue learning and experimenting in the kitchen, and to use proper measuring techniques and conversions to take your cooking and baking skills to the next level. With a little practice and patience, you can create delicious and impressive dishes that are sure to impress your family and friends.
