Share with your friends!
When I make this Caramel Chocolate Raspberry Tart for a gathering, the detail that matters most isn’t the chocolate or the raspberries—it’s the caramel chocolate layer. If you’ve ever burned caramel, seized chocolate, or ended up with a grainy filling, you’re exactly who I’m thinking about here. This recipe walks you through getting that layer perfectly smooth and glossy every time.
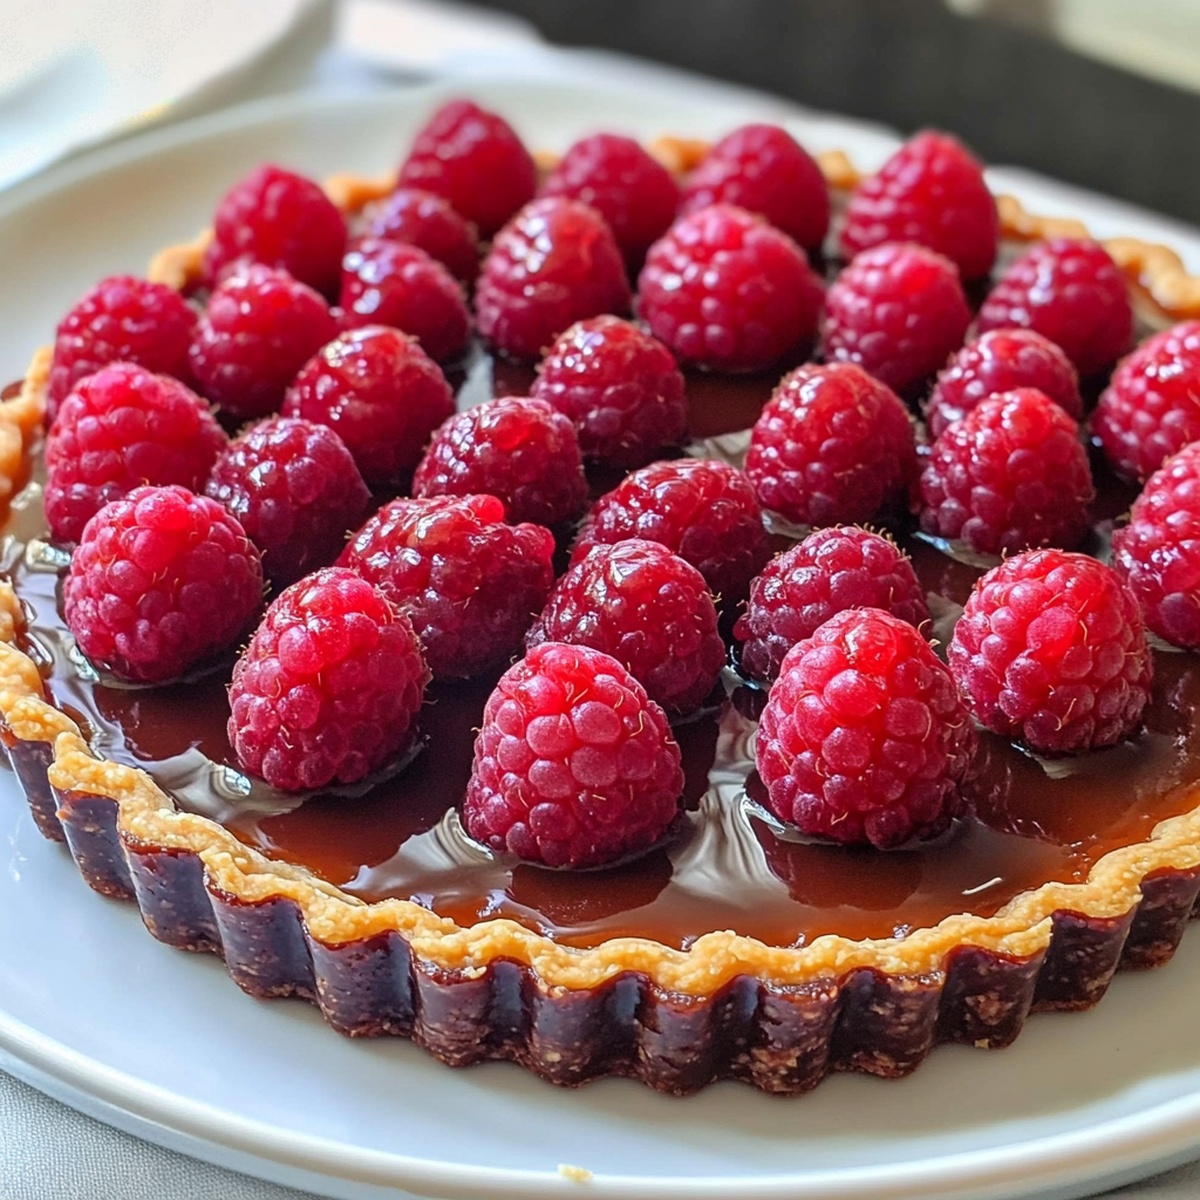
The goal is simple: a crisp cocoa crust, a silky caramel chocolate center, and bright, fresh raspberries on top. The technique that ties it all together is learning when to stop cooking the sugar, how to cool it slightly, and how to bring in the cream and chocolate without shocking or splitting the mixture. Once you understand what to look for in the pot—color, bubbles, and texture—you’re not guessing anymore.
This tart is great for seasonal entertaining because you can lean on local raspberries when they’re at their peak and still use the same base recipe in cooler months with frozen fruit. You can prep most of it ahead, assemble it calmly before guests arrive, and serve a dessert that looks impressive without being expensive. If you’re ready to get comfortable with caramel and pull off a dessert that really gathers people around the table, this is a smart one to master.
All About Caramel Chocolate Raspberry Tart
Click here to get printable version
In Your Basket
- 3/4 cup unsalted butter, ice-cold (for crust)
- 1 3/4 cup all-purpose flour
- 1/4 cup dark cocoa powder
- 1/4 tsp salt
- 6 tbsp cold water, plus 1 tbsp extra if needed
- 1 cup sugar
- 1/4 cup water
- 1/4 cup unsalted butter
- 1/2 cup heavy cream
- 1 tsp vanilla extract
- Pinch of salt
- 1 cup semi-sweet chocolate chips
- 3 cups fresh or frozen raspberries (for sauce)
- 1/2 cup white granulated sugar (for sauce)
- 1 tbsp lemon juice (optional, for brightness)
- 2 cups fresh raspberries (for topping)
The Updated Method
- Start the cocoa crust. Add the ice-cold butter, flour, cocoa powder, and salt to a food processor. Pulse in short bursts for about 1 minute, until the mixture looks like fine, even crumbs. (If you don’t have a processor, cut the butter in with a pastry cutter or two forks.)
- Bring the dough together. Sprinkle in 6 tablespoons of cold water and pulse again until the dough starts clumping and forms a ball. If it’s still dry and crumbly, add up to 1 extra tablespoon of water. The dough should hold when pressed, not feel sticky.
- Chill for structure. Shape the dough into a flat disk, wrap it tightly in plastic wrap, and refrigerate for about 1 hour. This firms the butter and helps keep the crust flaky and prevents shrinking in the oven.
- Cook the caramel base. In a medium saucepan, combine the 1 cup sugar and 1/4 cup water. Do not stir. Set over medium heat and let it come to a gentle simmer. Cook for 6–10 minutes, watching closely, until the syrup turns a deep golden-amber color. Once it darkens, remove it from heat immediately to avoid burning.
- Finish the caramel cream. Off the heat, carefully whisk in the 1/4 cup butter and 1/2 cup heavy cream. The mixture will bubble up, so pour slowly and keep whisking until everything is melted and smooth.
- Add chocolate and flavoring. Stir in the chocolate chips, vanilla extract, and a pinch of salt. Let the mixture sit undisturbed for about 1 minute so the chocolate softens, then whisk until the sauce is completely smooth and glossy. Cover and let it cool at room temperature while you continue. It should thicken slightly as it cools.
- Make the raspberry sauce. Add 3 cups raspberries (fresh or frozen) and 1/2 cup sugar to a saucepan. If the berries are very thick, add up to 2 tablespoons of water. Bring to a gentle simmer over medium heat and cook for 5–6 minutes, until the berries break down and the mixture is juicy.
- Strain for a smooth finish. Pour the hot raspberry mixture into a fine-mesh strainer set over a bowl. Use the back of a spoon to press the pulp through until only seeds remain in the strainer. Discard the seeds. Stir in lemon juice if using, then transfer the seedless sauce to a small bowl to cool.
- Preheat and roll the crust. Preheat your oven to 350°F (177°C). Lightly flour your work surface. Roll the chilled dough into a circle about 1 inch larger than your tart pan (8-, 9-, or 10-inch all work). The dough should be an even thickness so it bakes uniformly.
- Line the pan. Gently lift the dough into the tart pan, easing it into the corners without stretching. Press it lightly against the sides, then trim away any excess. Use a fork to prick the base all over to prevent bubbles.
- Blind bake. Place a round of parchment paper over the crust and fill with pie weights or dried beans. Bake for 15 minutes. This helps the crust hold its shape.
- Finish baking the crust. Carefully remove the parchment and weights. Return the crust to the oven for another 10 minutes, or until it’s dry, firm, and crisp. The crust should be fully baked; it won’t cook more once filled. Let it cool completely in the pan.
- Assemble the tart base. Once the crust is cool, gently remove it from the tart pan and set it on a serving platter or cake stand. Pour in the cooled caramel chocolate filling and spread it evenly to the edges with an offset spatula or spoon.
- Add the raspberry layer. Spoon a thin layer of raspberry sauce over the chocolate caramel, using just enough to cover the surface lightly. Reserve about one-third of the sauce for serving.
- Top with fresh berries. Arrange the 2 cups of fresh raspberries over the top, pressing them gently into the sauce so they stay in place. You can go rustic and scattered or pack them in neatly for a more formal look.
- Chill and serve. Refrigerate the tart if you’re not serving right away. For the best texture, take it out about 30 minutes before serving so the filling can soften slightly. Slice with a sharp knife, wiping the blade between cuts, and serve with the reserved raspberry sauce on the side.
Tips for Flaky Cocoa Crust
For a reliably flaky cocoa crust, temperature control is your best tool. Keep the butter and water very cold, and avoid overworking the dough. Visible small bits of butter are a good sign—they create steam pockets as they bake, which translates into layers. When rolling, work quickly and lightly; if the dough softens or feels greasy, pop it back in the fridge for 10 minutes. Docking (pricking) the base thoroughly and using pie weights will help prevent puffing or shrinking, especially in a tart pan with high sides. For entertaining, bake the crust a few hours ahead so it’s completely cool and crisp before assembly.
Getting Silky Caramel Chocolate
Silky caramel chocolate comes down to patience and sequence. First, cook the sugar syrup until it’s a deep golden amber—too pale and you’ll miss the flavor, too dark and it turns bitter. Remove it from heat before adding cream or butter to avoid scorching. When you add the chocolate, let it sit in the hot caramel-cream mixture for a minute before whisking; this helps it melt evenly and prevents graininess. If the mixture looks slightly separated, keep whisking steadily; it often comes back together as it cools. For a smooth finish, avoid refrigerating the filling before it’s in the crust, as rapid chilling can cause a dull surface.
Fresh vs Frozen Raspberries
Both fresh and frozen raspberries work well in this tart, but they shine in different roles. For the sauce, frozen berries are practical and economical, especially when local fruit is out of season. They break down quickly and give you a strong raspberry flavor. For the topping, fresh, seasonal raspberries are best—firm berries hold their shape, sit neatly on the tart, and won’t release excess juice onto the surface. If you only have frozen berries, use them for the sauce and consider skipping the fresh topping in favor of extra sauce at serving time. Whatever you choose, taste your berries; if they’re very tart, a touch of extra sugar or lemon adjustment can balance the flavors.
Before You Try It: FAQs
Can I make this tart ahead for a party without the crust getting soggy?
Yes, and timing makes a big difference. For the best texture, you can bake the crust up to 24 hours in advance; once completely cool, store it covered at room temperature. The caramel chocolate filling can be made a day ahead and kept covered in the fridge, then gently brought back toward room temperature so it’s spreadable. Assemble the tart (filling, raspberry layer, and berries) no more than 4–6 hours before serving. Keeping it chilled and only slicing just before serving helps the crust stay crisp and the layers defined.
How do I scale this recipe if my tart pan is a different size or I want mini tarts?
You can adapt this recipe to different pan sizes with a bit of planning. For a smaller 8-inch tart, you can use all the crust dough but expect a slightly thicker edge, or reserve a bit and freeze it for another use. The filling and sauce quantities are forgiving; you may just have a little extra, which is great over ice cream. For mini tarts, press the dough thinly into each cavity and reduce blind-baking time by a few minutes. Check early—mini shells brown faster. Fill them after cooling and chill until set. For larger pans, increasing everything by about 25–30% typically works, but watch the caramel color rather than the clock.
Caramel Chocolate Raspberry Tart
Equipment
- food processor (or pastry cutter)
- tart pan (8–10 inch)
- saucepan
- fine-mesh strainer
- Rolling Pin
Ingredients
Chocolate Crust:
- 3/4 cup unsalted butter ice-cold, cubed
- 1 3/4 cup all-purpose flour
- 1/4 cup dark cocoa powder
- 1/4 teaspoon salt
- 6 tablespoons cold water add more 1 tbsp if needed
Chocolate-Caramel Filling:
- 1 cup granulated sugar
- 1/4 cup water
- 1/4 cup unsalted butter
- 1/2 cup heavy cream
- 1 teaspoon vanilla extract
- salt pinch
- 1 cup semi-sweet chocolate chips
Raspberry Sauce:
- 3 cups raspberries fresh or frozen
- 1/2 cup granulated sugar
- 1 tablespoon lemon juice optional
Topping:
- 2 cups fresh raspberries for topping
Instructions
- Gather all ingredients and equipment before starting so preparation proceeds smoothly.
For the Chocolate Crust:
- Combine the chilled butter, flour, cocoa and salt in a food processor and pulse until the mixture looks like fine crumbs. If you don't have a processor, use a pastry cutter or two forks to cut the butter into the dry ingredients.
- Add the cold water and pulse briefly until the dough just comes together into a ball, adding up to 1 tablespoon more water if required. Wrap the dough tightly and refrigerate for 1 hour to firm up.
For the Chocolate-Caramel Filling:
- Place the sugar and 1/4 cup water in a medium saucepan and heat over medium without stirring. Allow the syrup to simmer and watch it carefully until it turns a deep golden-amber color, about 6–10 minutes.
- Remove the pan from heat and whisk in the butter and heavy cream until fully incorporated. Add the chocolate chips, vanilla, and a pinch of salt; let the mixture sit for about a minute, then whisk until the filling is completely smooth. Cover and let cool to room temperature.
For the Raspberry Sauce:
- Combine the raspberries and 1/2 cup sugar in a small saucepan and bring to a gentle simmer over medium heat. Add 2 tablespoons of water if the fruit seems dry and simmer for 5–6 minutes until softened.
- Push the cooked raspberries through a fine-mesh strainer into a bowl, using the back of a spoon to extract the puree and leaving the seeds behind. Set aside the sauce, reserving roughly one-third for serving.
Baking and Assembly:
- Preheat the oven to 350°F (177°C). On a lightly floured surface, roll the chilled dough out to be about 1 inch larger than your tart pan (works with 8–10 inch pans). Gently ease the dough into the pan, trim excess, and prick the bottom with a fork to prevent bubbling.
- Line the crust with a round of parchment and fill with pie weights or dried beans. Blind-bake for 15 minutes, remove the weights and paper, then bake an additional 10 minutes until the crust is crisp and well-browned. Allow it to cool, then carefully remove from the pan and transfer to a serving platter.
- Spread the cooled chocolate-caramel filling evenly into the baked crust, taking it to the edges. Spoon a thin layer of the raspberry sauce over the filling, keeping about one-third of the sauce for serving.
- Arrange the fresh raspberries on top of the tart, pressing them gently into the sauce so they sit snugly. Refrigerate until the tart firms, and remove about 30 minutes before serving. Serve slices with the reserved raspberry sauce.