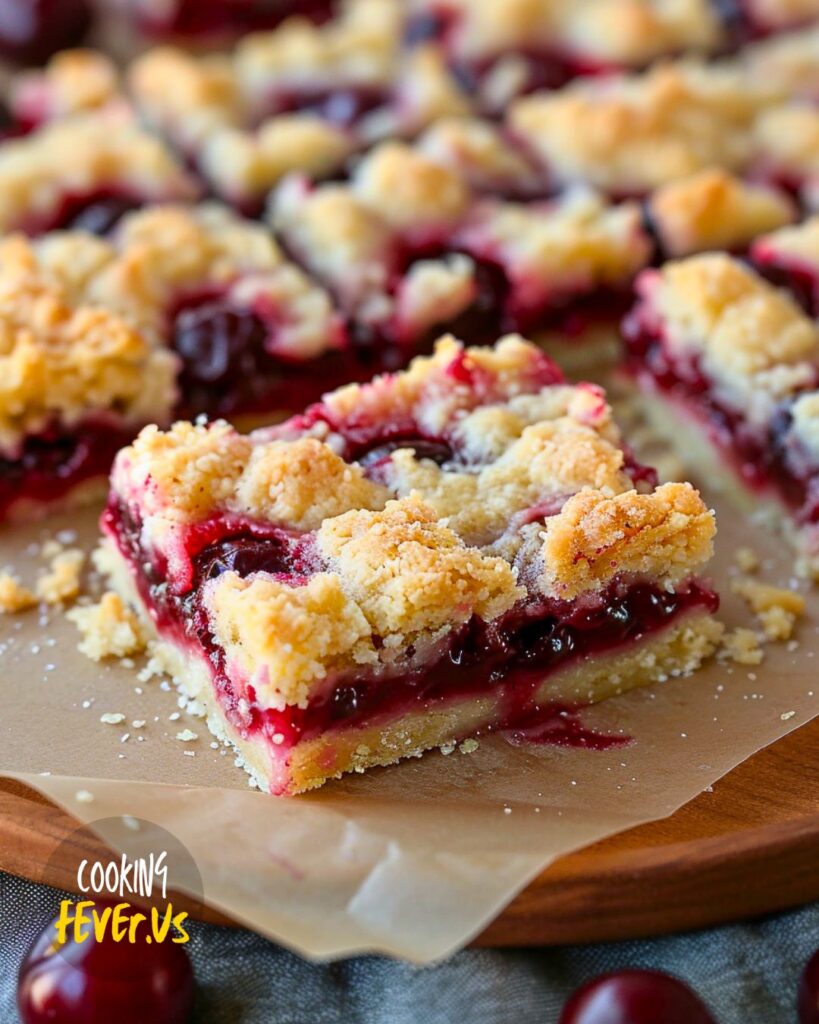
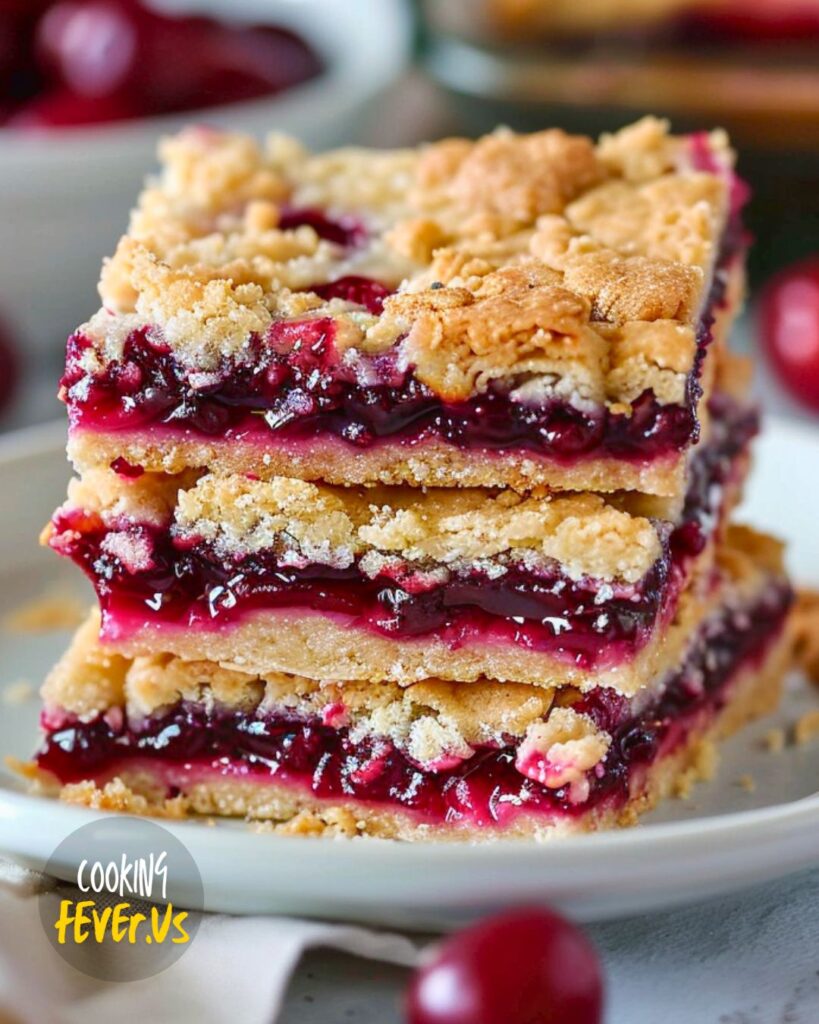
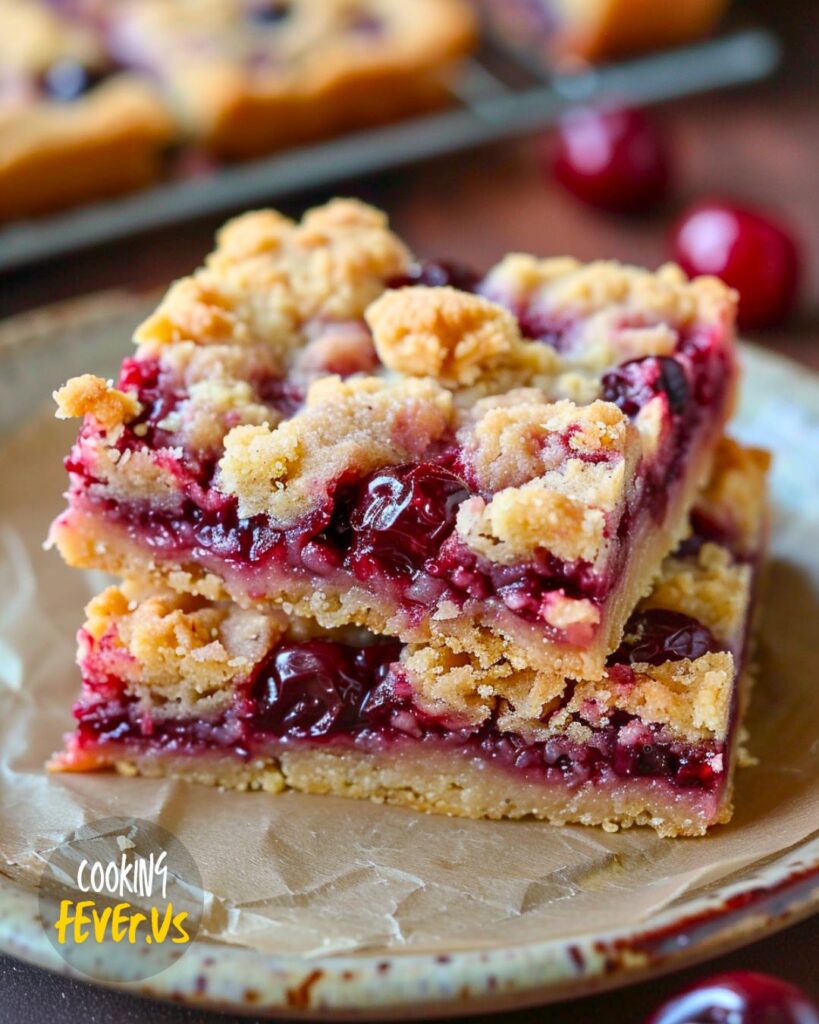
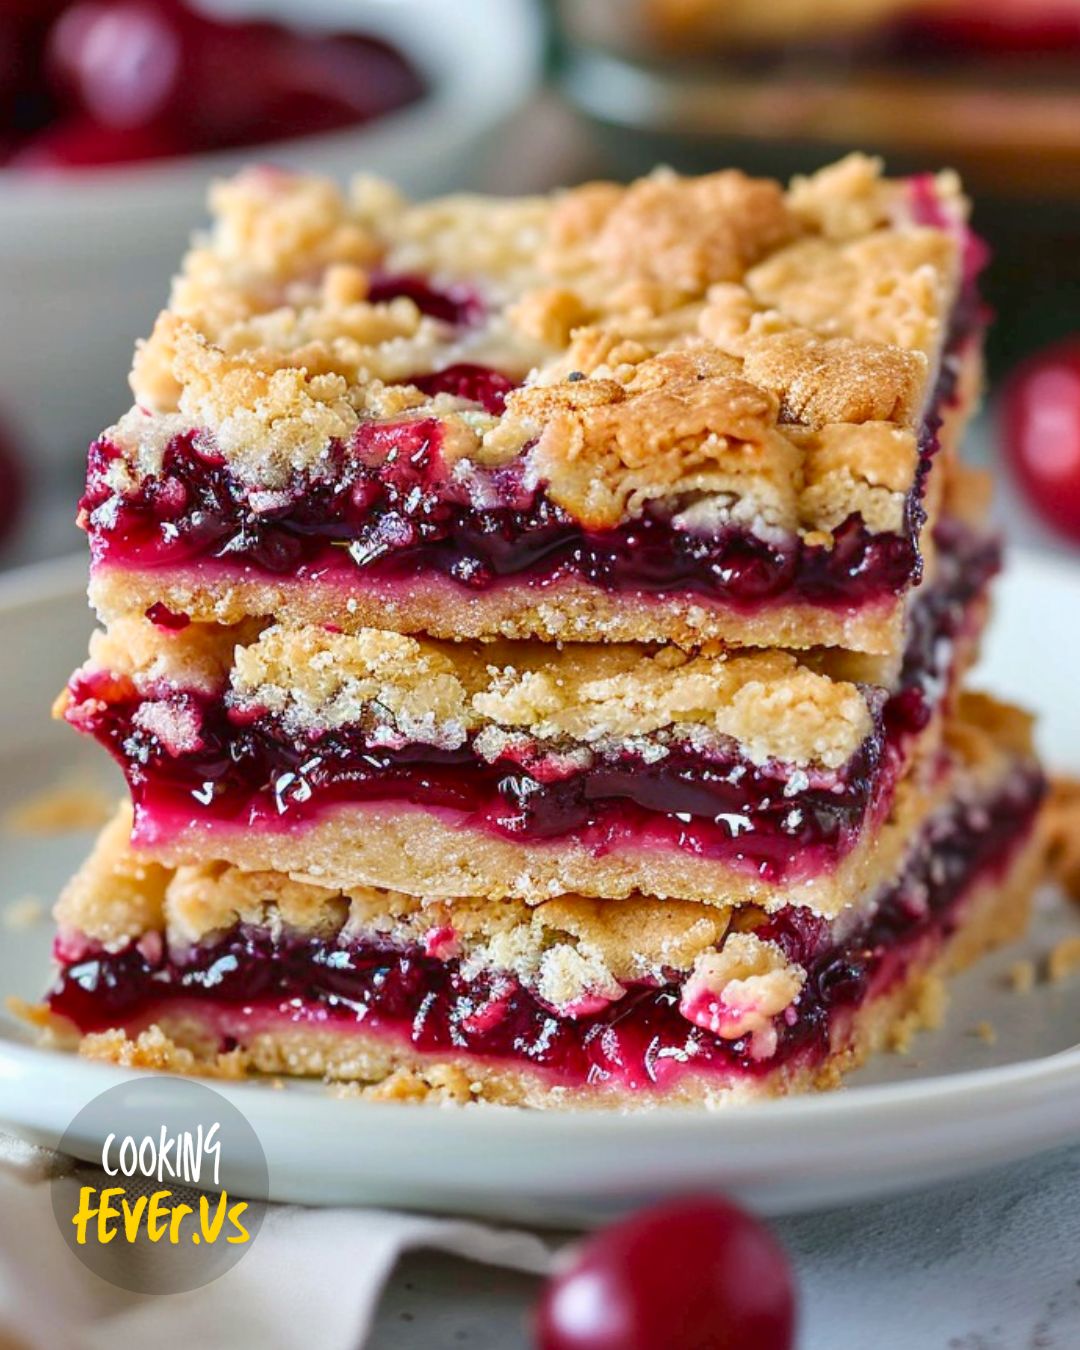
Summer always brings a sense of nostalgia for me, and one of my fondest memories is from a family vacation we took to Michigan’s cherry orchards. As a child, I remember being utterly fascinated by the vibrant, red tart cherries that we picked straight from the trees. This Red Tart Cherry Pie Bars recipe takes me back to those sunny days, capturing the tangy sweetness of those cherries in a delicious, easy-to-make treat.
The first time I tried this recipe was during a holiday gathering with friends. I wanted to bring something that reminded me of summer but was still fitting for the winter season. The bright cherry filling contrasted beautifully with the buttery shortbread crust, making these bars an instant hit. What I love about this recipe is how simple yet versatile it is. The shortbread crust, enriched with a hint of sweetened shredded coconut, provides a lovely texture that complements the tart cherry filling perfectly.
If you’re a fan of experimenting in the kitchen, there are plenty of ways to put your own spin on these bars. Adding a bit of almond extract to the filling can introduce a new layer of flavor that pairs wonderfully with cherries. For a more festive twist, you might sprinkle some finely chopped nuts, such as pecans or almonds, over the crumble topping before baking. These variations not only enhance the flavor but also add a delightful crunch.
One of the key steps in this recipe is allowing the cherries to drain properly and ensuring the filling thickens sufficiently while cooking. This step is crucial for achieving that perfect, jammy consistency that sets well between the layers of crust. I also recommend refrigerating the bars before cutting them, as it makes slicing into neat, even squares much easier.
Sharing this recipe with friends and family has become a cherished tradition. Whether it’s a summer picnic, a holiday dessert table, or just a weekend baking project, these Red Tart Cherry Pie Bars are a delightful treat that brings a bit of sunshine to any occasion. Enjoy baking and savoring these bars, and don’t forget to make your own memories with every bite.
Making the Red Tart Cherry Pie Bars
Click here to get printable version
Ingredients
- 1 teaspoon vanilla extract
- 2 tablespoons cornstarch
- 3 tablespoons shredded sweetened coconut
- 16 tablespoons unsalted butter (melted, plus extra for brushing)
- 1/2 teaspoon salt
- 3/4 cup granulated sugar
- 1/4 teaspoon baking powder
- 2 cans (14-ounce each) Oregon Fruit Red Tart Cherries
- 1 tablespoon lemon juice
- 2 5/8 cups all-purpose flour
- 1/4 teaspoon salt
- 1/2 cup granulated sugar
Directions
- Set a medium strainer over a large bowl and drain the cherries for 5 minutes.
- Transfer the cherries to a 2- or 3-quart saucepan. Add sugar, cornstarch, salt, and lemon juice, stirring until the cornstarch dissolves. Let sit for 5 minutes.
- Heat the cherry mixture over medium-high heat, stirring occasionally until it boils. Reduce to medium and cook for another minute, stirring constantly until thickened and glossy. Remove from heat and stir in vanilla extract. Set aside.
- Preheat the oven to 350°F. Lightly brush a 9×9-inch square pan with melted butter and line with parchment paper, ensuring overhang on all sides. Brush the parchment with butter.
- Melt the butter over low heat. In a large bowl, whisk together flour, sugar, salt, and baking powder for 30 seconds.
- Pour melted butter into the flour mixture and stir until no white bits remain. Reserve about 1 cup of the crust mixture and combine it with shredded coconut.
- Press the remaining crust mixture into the prepared pan in an even layer. Bake for 21-23 minutes until edges are golden brown.
- Remove the crust from the oven but keep the oven on at 350°F. Spread the cherry filling over the baked crust using an offset spatula for an even layer. Sprinkle the reserved crumble mixture over the filling.
- Bake for 20-22 minutes until the edges bubble and the topping is light golden brown. Cool on a wire rack. Loosen the edges with a spatula or knife.
- Once cooled, refrigerate for easier cutting. Use the parchment sling to lift the bars and cut them into either 16 squares (2-1/8×2-1/8 inches) or 9 squares (3×3 inches).
FAQs:
How do I know when the cherry filling is thickened properly?
The cherry filling is thickened properly when it reaches a glossy appearance and can coat the back of a spoon. Stir constantly and look for a noticeable thickening after the mixture boils and cooks for about one minute on medium heat.
Can I use fresh cherries instead of canned cherries?
Yes, you can use fresh cherries. If using fresh cherries, pit and measure out an equivalent weight to the canned cherries. You may need to add a bit of water or cherry juice to mimic the canned cherries’ liquid content.
What if I don’t have parchment paper for lining the pan?
If you don’t have parchment paper, you can generously grease the pan with butter or non-stick spray. This will help prevent the bars from sticking. However, parchment paper is recommended for the easiest removal and clean-up.
Can I freeze the Red Tart Cherry Pie Bars?
Yes, these bars can be frozen. Once they have cooled completely, cut them into squares, wrap each piece in plastic wrap, and place them in a freezer-safe container or bag. They can be frozen for up to 3 months. Thaw in the refrigerator before serving.
What can I use as a substitute for cornstarch?
You can use an equal amount of arrowroot powder or tapioca starch as a substitute for cornstarch. These alternatives will provide a similar thickening effect for the cherry filling.
How long should I refrigerate the bars before cutting?
Refrigerate the bars for at least one hour to firm up before cutting. This helps achieve cleaner cuts and makes it easier to handle the bars.
Red Tart Cherry Pie Bars
Ingredients
Red Tart Cherry Filling:
- 2 cans 14-ounce each Oregon Fruit Red Tart Cherries
- 1/2 cup sugar 100 grams
- 2 tablespoons cornstarch 18 grams
- 1/4 teaspoon salt
- 1 tablespoon lemon juice
- 1 teaspoon vanilla extract
Shortbread Crust:
- 2 5/8 cups all-purpose flour 336 grams
- 3/4 cup sugar 150 grams
- 1/2 teaspoon salt
- 1/4 teaspoon baking powder
- 16 tablespoons unsalted butter melted, plus extra for brushing (227 grams)
- 3 tablespoons sweetened shredded coconut
Instructions
Red Tart Cherry Filling:
- Place a medium strainer over a large bowl and pour the cherries into it, allowing them to drain for 5 minutes.
- Transfer the cherries to a 2- or 3-quart saucepan. Add sugar, cornstarch, salt, and lemon juice. Stir until the cornstarch dissolves. Let it sit for 5 minutes, until liquid forms in the pan.
- Heat the mixture over medium-high, stirring occasionally, until it boils. Reduce to medium and cook for another minute, stirring constantly, until thickened and glossy. Remove from heat and mix in vanilla extract. Set aside.
Shortbread Crust and Topping:
- Preheat the oven to 350°F. Lightly brush a 9x9-inch square pan with melted butter. Line the pan with parchment paper, ensuring overhang on all sides, and brush the parchment with butter.
- Melt the butter over low heat. In a large bowl, whisk together flour, sugar, salt, and baking powder for 30 seconds.
- Pour melted butter into the flour mixture and stir until no white bits remain. Reserve 225 grams (about 1 cup) of the crust mixture and combine it with shredded coconut.
- Press the remaining crust mixture into the prepared pan in an even layer. Bake for 21-23 minutes until edges are golden brown.
Assemble the Red Tart Cherry Pie Bars:
- Remove the crust from the oven and keep the oven on at 350°F. Spread the cherry filling over the baked crust using an offset spatula for an even layer. Sprinkle the reserved crumble mixture over the filling.
- Bake for 20-22 minutes until the edges bubble and the topping is light golden brown. Cool on a wire rack. Loosen the edges with a spatula or knife.
- Once cooled, refrigerate for easier cutting. Use the parchment sling to lift the bars and cut them into either 16 squares (2-1/8x2-1/8 inches) or 9 squares (3x3 inches).
Storage:
- These bars are best enjoyed within two days. Store at room temperature in an airtight container for up to 2 days or refrigerate for up to 10 days.
