

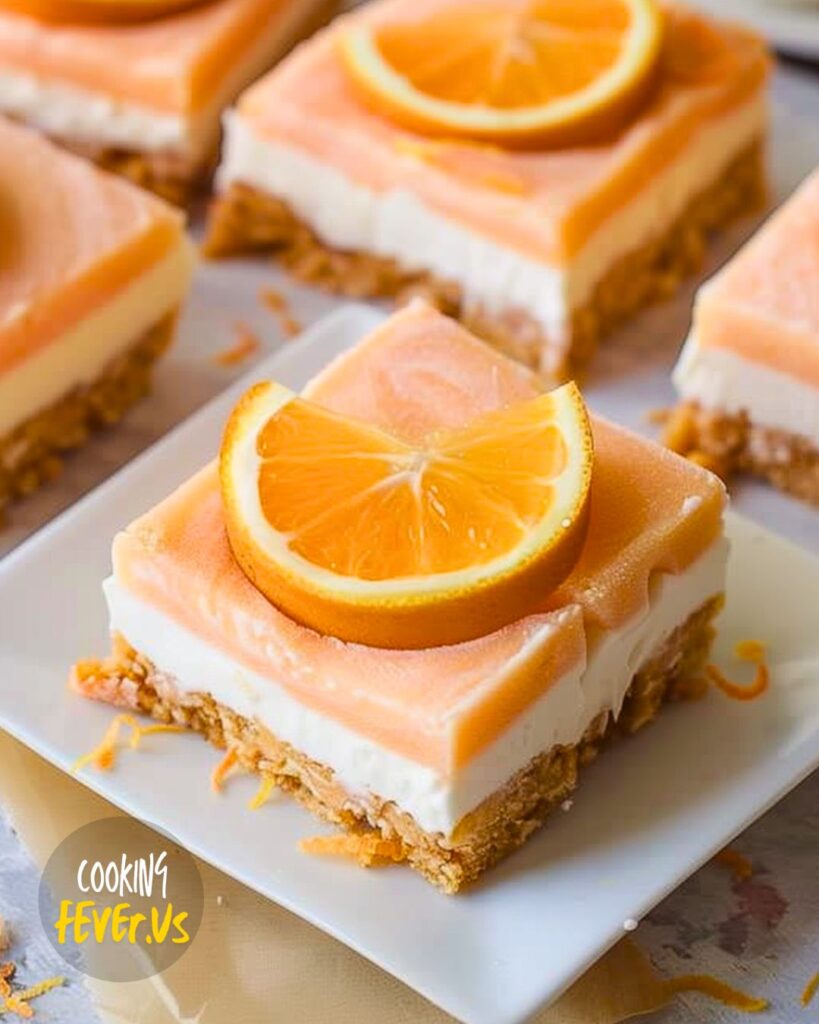
When summer rolls around and the sun is high, my family and I crave refreshing treats that capture the essence of the season. One of my favorite summer memories involves an impromptu picnic with friends at the local park. We had an array of snacks and drinks, but it was the Orange Creamsicle Dream Bars that truly stole the show. The creamy, citrusy layers were reminiscent of those classic orange creamsicle popsicles we loved as kids, but in a more sophisticated, shareable form.
These bars are a delightful no-bake dessert, perfect for any summer gathering or just a special family treat. The combination of the smooth cheesecake layer with the tangy orange gelatin creates a wonderful balance that is both nostalgic and refreshing. The Nilla Wafer crust adds a nice crunch that complements the creamy layers perfectly.
What I love about this recipe is its versatility. You can easily tweak it to suit your taste or the occasion. For a tropical twist, consider adding a bit of coconut extract to the cheesecake layer. If you prefer a less sweet option, reduce the powdered sugar slightly. The addition of orange gel food coloring is optional, but it does give the bars a vibrant, appealing hue that matches their bright flavor.
These bars are straightforward to make, but they do require some patience as they need time to set. However, the result is well worth the wait. Whether you’re making them for a potluck, a family barbecue, or just because, Orange Creamsicle Dream Bars are sure to be a hit. They bring together the creamy, tangy, and sweet in a way that is both nostalgic and refreshingly modern. Enjoy making these delightful treats, and don’t be surprised if they become a staple in your summer dessert repertoire!
Preparing Orange Creamsicle Dream Bars
Click here to get printable version
Ingredients
- 8 ounces whipped topping (divided)
- 1 ⅓ cups Nilla Wafer crumbs
- 5 tablespoons unsalted butter
- 3 ounces orange gelatin mix
- ¾ cup hot water
- ¾ cup cold water
- 8 ounces softened cream cheese (divided)
- 1 ¼ cups confectioners’ sugar
- 2 teaspoons orange flavoring
- 8 drops orange gel coloring (optional)
- 3 cups whipped topping (divided)
- 1 teaspoon vanilla essence
Directions
- Line an 8×8-inch pan with parchment paper, ensuring there is extra to lift the bars out for easy cutting.
- Microwave the butter in a medium bowl for around 30 seconds. Stir and heat for another 5-10 seconds if necessary.
- Pulse the Nilla Wafers in a food processor until finely ground.
- Mix the wafer crumbs with the melted butter until well combined, then press evenly into the prepared pan. Freeze for at least 30 minutes.
- In a measuring cup, dissolve the orange gelatin in the hot water, stirring until fully dissolved. Add the cold water and refrigerate until cool but not set, about 10 minutes.
- In a bowl, beat 8 ounces of cream cheese with ¼ cup powdered sugar, orange extract, and optional orange coloring until smooth. Gradually add the cooled gelatin while mixing continuously. Refrigerate for one hour to thicken.
- Beat the remaining 8 ounces of cream cheese with 1 cup powdered sugar and vanilla extract until creamy. Fold in 1 cup whipped topping gently.
- Spread the cheesecake mixture over the frozen crust, smoothing it out evenly.
- Fold the remaining 2 cups of whipped topping into the chilled orange cream mixture until well combined. Pour this over the cheesecake layer, spreading it evenly.
- Refrigerate the bars for at least 6 hours or overnight to set.
Storing Suggestions:
Keep the Orange Creamsicle Dream Bars in the refrigerator, covered with plastic wrap or in an airtight container. They will stay fresh for up to 5 days. For longer storage, you can freeze them for up to a month. Thaw in the refrigerator before serving.
FAQs:
Can I use homemade whipped cream instead of Cool Whip?
Yes, you can substitute homemade whipped cream for Cool Whip. Just make sure to whip it to stiff peaks to achieve a similar consistency. However, keep in mind that the texture might differ slightly from the original recipe.
How can I make the crust firmer?
If you prefer a firmer crust, bake the Nilla Wafer and butter mixture at 350°F for 10 minutes before freezing. This will give the crust a more solid foundation.
What should I do if the gelatin layer doesn’t set?
If the gelatin layer remains runny, it may not have cooled enough before mixing with the cream cheese. Ensure the gelatin is cool but not set before combining. Refrigerate longer if needed to achieve the desired consistency.
Is there an alternative to Nilla Wafers for the crust?
You can use graham cracker crumbs, digestive biscuits, or even shortbread cookies as a substitute for Nilla Wafers. Just ensure they are finely ground for the best texture.
Can I use another flavor of gelatin?
Absolutely! You can experiment with different gelatin flavors to create variations of this dessert. Lemon, raspberry, or lime gelatin would work well and offer a different taste experience.
What is the best way to cut these bars neatly?
For clean slices, use a sharp knife and wipe it with a damp cloth between each cut. Chilling the bars well before cutting will also help them hold their shape better, resulting in neater pieces.


Orange Creamsicle Dream Bars
Ingredients
- 8 ounces Cool Whip divided
- 1 ⅓ cups crumbs from Nilla Wafers
- 5 tablespoons unsalted butter
- 3 ounces orange-flavored gelatin
- 3/4 cup boiling water
- 3/4 cup cold water
- 8 ounces cream cheese room temperature
- 1/4 cup powdered sugar
- 2 teaspoons orange extract
- 8 drops orange gel food color optional
- 2 cups Cool Whip
- 8 ounces cream cheese room temperature
- 1 cup powdered sugar
- 1 teaspoon vanilla extract
- 1 cup Cool Whip
Instructions
Nilla Wafer Crust
- Line an 8x8-inch baking dish with parchment paper, leaving an overhang to lift out the bars for easy slicing.
- In a medium bowl, melt the butter in the microwave for about 30 seconds. Stir and continue heating for an additional 5-10 seconds if needed.
- Using a food processor, pulse the Nilla Wafers until they turn into fine crumbs.
- Combine the cookie crumbs with the melted butter, mixing thoroughly with a spatula until well blended.
- Press the mixture evenly into the prepared baking dish to form the crust. Place the dish in the freezer for at least 30 minutes while preparing the other layers.
Orange Gelatin
- In a 2-cup measuring cup, dissolve the orange gelatin in the boiling water, stirring until fully dissolved.
- Stir in the cold water and refrigerate until the mixture is cool but not set, about 10 minutes.
Orange Cream Layer
- In a mixing bowl, beat 8 ounces of cream cheese with the powdered sugar, orange extract, and optional orange food coloring until smooth.
- Gradually pour in the cooled gelatin while continuously mixing to achieve a smooth consistency. Chill the mixture in the refrigerator for one hour to thicken. *See Note.
Cheesecake Layer
- In another mixing bowl, beat the remaining 8 ounces of cream cheese with the powdered sugar and vanilla extract until creamy and smooth.
- Gently fold in 1 cup of Cool Whip using a rubber spatula.
- Spread the cheesecake mixture over the frozen crust, smoothing it into an even layer with an offset spatula.
- Carefully fold the remaining 2 cups of Cool Whip into the chilled orange cream mixture until well combined and smooth.
- Pour the orange cream mixture over the cheesecake layer and spread evenly with an offset spatula.
- Refrigerate the assembled bars overnight or for at least 6 hours to set.