Share with your friends!
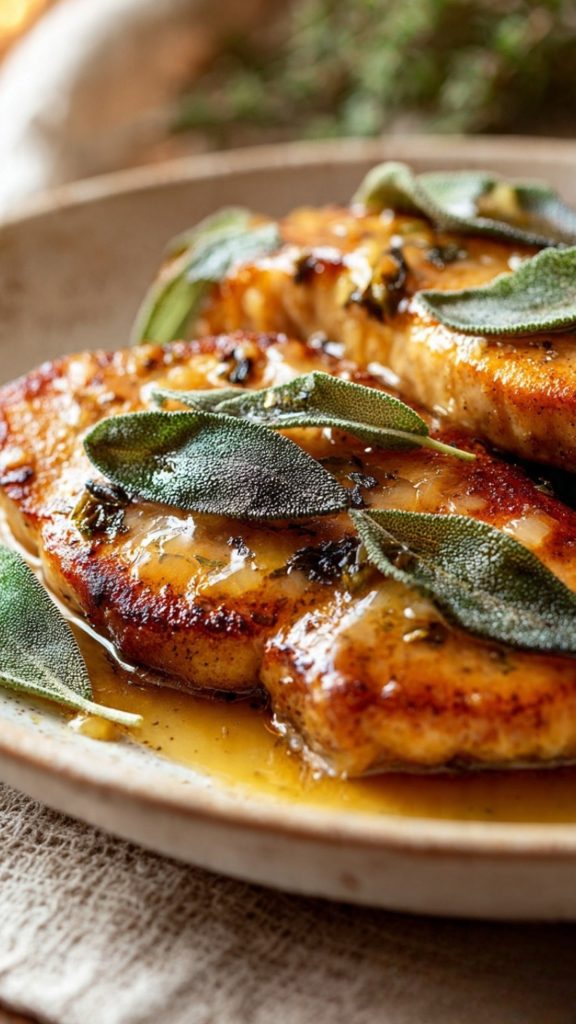
Chicken breast can be pretty boring if you just salt it and toss it in a pan. This brined chicken breast with garlic and crispy sage is my way of fixing that without adding a ton of work. It takes the basic “pan-seared chicken” idea and upgrades it with a quick brine and a crunchy herb topping.
The brine is fast — we’re talking 15 minutes on the counter — but it completely changes the texture of the meat. It stays juicy, even if you get distracted by side dishes or guests. Cooking the reserved garlic and sage in the pan gives you big flavor without extra chopping or extra dishes. And those fried sage leaves on top make it look restaurant-level with almost zero effort, which is exactly what I want when people are coming over.
Easy & Delicious: Brined Chicken Breast With Garlic And Crispy Sage
Click here to get printable version
What Goes In
- 4 cups cold water
- 1/3 cup table salt
- 20 sage leaves, divided
- 4 cloves garlic, minced
- 4 boneless, skinless chicken breasts
- 2 tablespoons unsalted butter
- 3 tablespoons good olive oil, divided
- Extra 12 sage leaves for frying (from the 20 total)
How It’s Done
- Make the brine: In a large bowl, stir the cold water and salt until the salt is completely dissolved. If you still see grains of salt, keep stirring so the brine works evenly. Add 8 sage leaves, the minced garlic, and the chicken breasts. Gently move the chicken around so everything is coated, then let it sit at room temperature for 15 minutes. The chicken should be fully submerged.
- Strain and reserve flavor bits: Lift the chicken out onto a paper towel–lined plate. Pour the brine through a mesh strainer set over a bowl to catch the sage and garlic. Discard the salty liquid, but keep the strained sage and garlic for cooking later.
- Dry the chicken well: Pat the chicken breasts thoroughly dry on all sides with paper towels. This step matters; if the surface is wet, the chicken will steam instead of getting a nice golden sear.
- Preheat the pan: Set a large non-stick or well-seasoned skillet over medium heat and let it warm up for a minute or two. Add the butter and 2 tablespoons of olive oil. Once the butter is melted and foamy, you’re ready for the chicken.
- Sear the first side: Lay the chicken breasts in the hot pan, leaving space between them. Cook for about 5 minutes without moving them. You’re looking for light golden color and the edges starting to turn opaque.
- Add the garlic and sage: After 5 minutes, scatter the reserved sage leaves and garlic from the brine into the pan around the chicken. Let them sizzle in the butter and oil so the fat picks up their flavor.
- Cook the second side: Flip each chicken breast and cook for another 3 minutes. Keep an eye on the garlic; if it starts to get too dark, lower the heat slightly so it doesn’t burn.
- Finish gently with steam: Turn the heat down to low, cover the pan with a lid, and cook for 2 more minutes. This traps the moisture and finishes cooking the chicken evenly without drying it out.
- Check doneness: Insert a meat thermometer into the thickest part of each breast. You’re aiming for an internal temperature of 160°F. If they’re not there yet, cover the pan again and cook over low heat, checking every minute or two.
- Rest the chicken: Once the chicken hits 160°F, remove the pan from the heat but keep the lid on. Let the chicken rest in the pan for 2 minutes. The carryover heat will bring it up to a safe temperature and keep the juices inside.
- Fry the sage leaves: While the chicken rests, fry the remaining 12 sage leaves. If the pan looks dry, add the remaining 1 tablespoon of olive oil. Heat over medium until the oil is hot but not smoking. Lay the sage leaves in a single layer and cook about 3–5 seconds per side, just until they darken slightly and crisp. They go from perfect to burnt fast, so don’t walk away. Transfer to a paper towel to drain.
- Plate and serve: Place the chicken breasts on a serving platter. Spoon the garlicky, sage-infused pan juices over the top. Finish with the crispy sage leaves scattered over the chicken. Serve right away.
Quick Garlic Brining Tips
A short brine is the main reason this chicken turns out so juicy without babysitting it. For this recipe, stick to 15 minutes max; longer can make the meat too salty and change the texture. Always use cold water so the chicken stays at a safe temperature. Stir until the salt is fully dissolved before adding the chicken, or the brine won’t season evenly. If your chicken breasts are very thick, you can lightly pound them to an even thickness first so they brine and cook at the same rate. And don’t skip drying the meat after brining — that’s what lets you get color in the pan instead of pale, rubbery chicken.
Getting Sage Leaves Crispy
Crispy sage feels fancy, but it takes less than a minute if you do it right. Use a thin, even layer of oil in the pan — enough to coat the bottom, not deep-fry. The oil should be hot enough that a leaf sizzles immediately, but not so hot that the oil smokes. Drop the sage leaves in flat, in a single layer, and cook just a few seconds per side. They should darken slightly and stiffen as they cool. If they’re still chewy, your oil wasn’t hot enough; if they taste bitter, they burned. Make extra for snacking or for topping mashed potatoes, soups, or roasted vegetables when you’re feeding a crowd.
Frequent Asked Questions:
How can I scale this brined chicken breast recipe for a larger group?
To feed more people, you can easily double or triple the recipe, but keep the brine ratio the same: 4 cups water to 1/3 cup table salt for every 4 chicken breasts. Use a larger bowl or a clean food-safe container so the chicken can sit in a single layer, fully submerged. For cooking, avoid overcrowding the pan; sear in batches so each piece gets proper browning. Once all the chicken is seared, you can transfer it to a sheet pan, pour the pan juices over, and finish it covered in a low oven until it reaches 160°F. This works well when you’re hosting and don’t want to juggle multiple skillets.
What if I don’t have a meat thermometer — how do I know the chicken is done?
A thermometer is the most reliable method, but if you don’t have one, there are a few signs to watch for. After the covered cooking time, cut into the thickest part of one breast: the juices should run clear, not pink, and the meat should be opaque all the way through. Press the center with your fingertip or tongs; fully cooked chicken feels firm but not rock-hard. If it’s very soft or looks glossy and translucent, cook it a bit longer over low heat with the lid on. Just be careful not to crank up the heat to “rush” it, or you’ll dry out the outside before the center cooks through.
Can I prep any parts of this recipe ahead of time for easier entertaining?
Yes, there are a few smart make-ahead moves. You can mince the garlic and wash and dry the sage leaves earlier in the day, then store them in airtight containers in the fridge. Right before guests arrive, brine the chicken for the full 15 minutes, then pat it dry and keep it covered in the fridge for up to an hour before cooking. You can also fry the sage leaves a couple of hours ahead; once they’re fully cool and dry, keep them in a loosely covered container at room temperature. Hold off on cooking the chicken until 20–30 minutes before serving so it stays juicy and warm for the table.

Brined Chicken Breast with Garlic and Crispy Sage
Equipment
- Large Bowl
- Mesh strainer
- paper towels
- Large non-stick or well-seasoned skillet
- meat thermometer
- Tongs
Ingredients
Brine & Chicken:
- 4 cups cold water
- 1/3 cup table salt
- 20 leaves sage leaves divided — 8 for the brine, 12 for frying
- 4 cloves garlic minced
- 4 boneless skinless chicken breasts
For Cooking:
- 2 tablespoons unsalted butter
- 3 tablespoons good olive oil divided; 2 tbsp for cooking, up to 1 tbsp for frying sage
Garnish:
- 12 leaves sage leaves for frying until crispy
Instructions
- Arrange all ingredients and equipment so they are ready to use.
For the Brine:
- Combine the water and salt in a large bowl and stir until the salt dissolves.
- Add 8 of the sage leaves, the minced garlic, and the chicken breasts to the brine, making sure the liquid covers the meat; let the chicken sit in the mixture for 15 minutes.
- Lift the chicken from the brine onto a paper towel–lined plate and pour the brine through a mesh strainer to collect the sage leaves and garlic. Discard the brine liquid.
- Pat the chicken dry thoroughly with paper towels.
For Cooking the Chicken:
- Warm a large nonstick or well-seasoned skillet over medium heat. Add the butter and 2 tablespoons of olive oil and allow the butter to melt and the fat to shimmer.
- Place the chicken in the hot pan and sear on the first side for about 5 minutes without moving it so a golden crust forms.
- Tuck the reserved sage leaves and the strained garlic from the brine into the pan around the chicken, then turn each breast and cook for another 3 minutes.
- Lower the heat to low, cover the skillet, and continue cooking for 2 minutes to finish through.
- Check doneness by inserting a meat thermometer into the thickest part of a breast; the recipe’s target is 160°F. If the chicken hasn’t reached the temperature, return the lid and cook briefly more until done.
- Remove the skillet from the heat, keep it covered, and let the chicken rest for 2 minutes so the juices settle.
For Frying Sage and Serving:
- While the chicken rests, add up to 1 tablespoon more olive oil to the pan if needed and warm it over medium heat.
- Working quickly, lay the remaining 12 sage leaves in the hot oil and fry for about 3–5 seconds per side until they become crisp; turn off the heat and transfer the leaves to paper towels to drain.
- Arrange the chicken breasts on a serving platter, spoon the pan juices over them, and top with the crispy fried sage leaves.
- Serve immediately and enjoy.