Share with your friends!
There’s something satisfying about putting together a pie that looks over-the-top but doesn’t turn your kitchen upside down. This Butterfinger Pie is one of those recipes. You crush cookies, stir a few things in bowls, and a couple of hours later you’ve got a chilled, candy-studded dessert that cuts clean slices and actually holds up on the table.
I first made this when I wanted a pie that felt fun and a little nostalgic, but without baking a complicated custard or fussing with blind baking. If you’re comfortable using a mixer and a spatula, you’re set. The Oreo crust comes together in minutes, and the filling is mostly cream cheese, peanut butter, and crushed Butterfinger bars. It’s rich, but not fussy.
This pie fits nicely into real life: it’s a strong option when you need something make-ahead for a potluck, a casual celebration, or a weekend dessert you can slice all week. You can use whatever peanut butter you keep on hand and, if you like to be mindful of ingredients, it works well with cream from a local dairy and seasonal toppings on the side, like fresh berries in summer or sliced apples in the fall. The main work happens ahead of time in the fridge, so when you’re ready to serve, you just whip the cream, pile it on, and you’re done.
Butterfinger Pie
Click here to get printable version
Your Ingredient Checklist
- Oreo Crust
- 36 Oreo cookies (one 14.3 oz package), cookies and cream filling together
- 7 Tbsp (98 g) unsalted butter, melted
- Filling
- 8 oz (226 g) cream cheese, softened to room temperature
- 1/2 cup (135 g) creamy peanut butter
- 1 cup (113 g) powdered sugar
- 16 fun-size Butterfinger bars, crushed or blended (about 2 cups)
- 8 oz (226 g) Cool Whip, thawed
- Whipped Cream Topping
- 1 cup (236 ml) heavy whipping cream
- 1/4 cup (28 g) powdered sugar
- 1 tsp vanilla extract
Technique-Focused Instructions
- Make the Oreo crust. Add the Oreos (cookies and filling) to a food processor or blender and process until you have fine, even crumbs. You shouldn’t see big chunks. In a large bowl, stir the crumbs and melted butter together until all the crumbs look evenly coated and slightly glossy.
- Press and chill the crust. Transfer the crumb mixture to a 9- or 10-inch pie pan. Use your fingers to spread it out, then press it firmly across the bottom and up the sides. A flat-bottomed measuring cup helps you pack it down tightly — it should feel compact, not loose. Place the crust in the fridge to chill while you prepare the filling.
- Beat the cream cheese mixture. In a large mixing bowl, add the softened cream cheese, powdered sugar, and peanut butter. Beat with an electric mixer on medium speed until the mixture is completely smooth and creamy, with no visible lumps of cream cheese. Scrape the bowl and beat again to make sure everything is evenly combined.
- Fold in Butterfingers and Cool Whip. Add the crushed Butterfinger bars and the thawed Cool Whip to the bowl. Mix on low speed just until everything is blended and the color is even. Stop as soon as it looks uniform so you don’t deflate the filling too much.
- Fill and chill the pie. Spoon the Butterfinger filling into the chilled Oreo crust. Spread it into an even layer, smoothing the top with a spatula. Cover the pie tightly with plastic wrap and refrigerate for at least 4 hours, or up to 8 hours, until the filling is firm enough to slice cleanly.
- Chill the bowl for whipped cream. About 20 minutes before you plan to serve, place a metal or glass mixing bowl and the mixer beaters in the freezer for 15 minutes. This helps the cream whip faster and hold its shape better.
- Whip the cream topping. Take the chilled bowl out of the freezer. Pour in the heavy whipping cream, then add the powdered sugar and vanilla extract. Beat with an electric mixer on medium-high for 4–5 minutes, or until stiff peaks form. The cream should be thick, scoopable with a spoon, and hold its shape without sliding off.
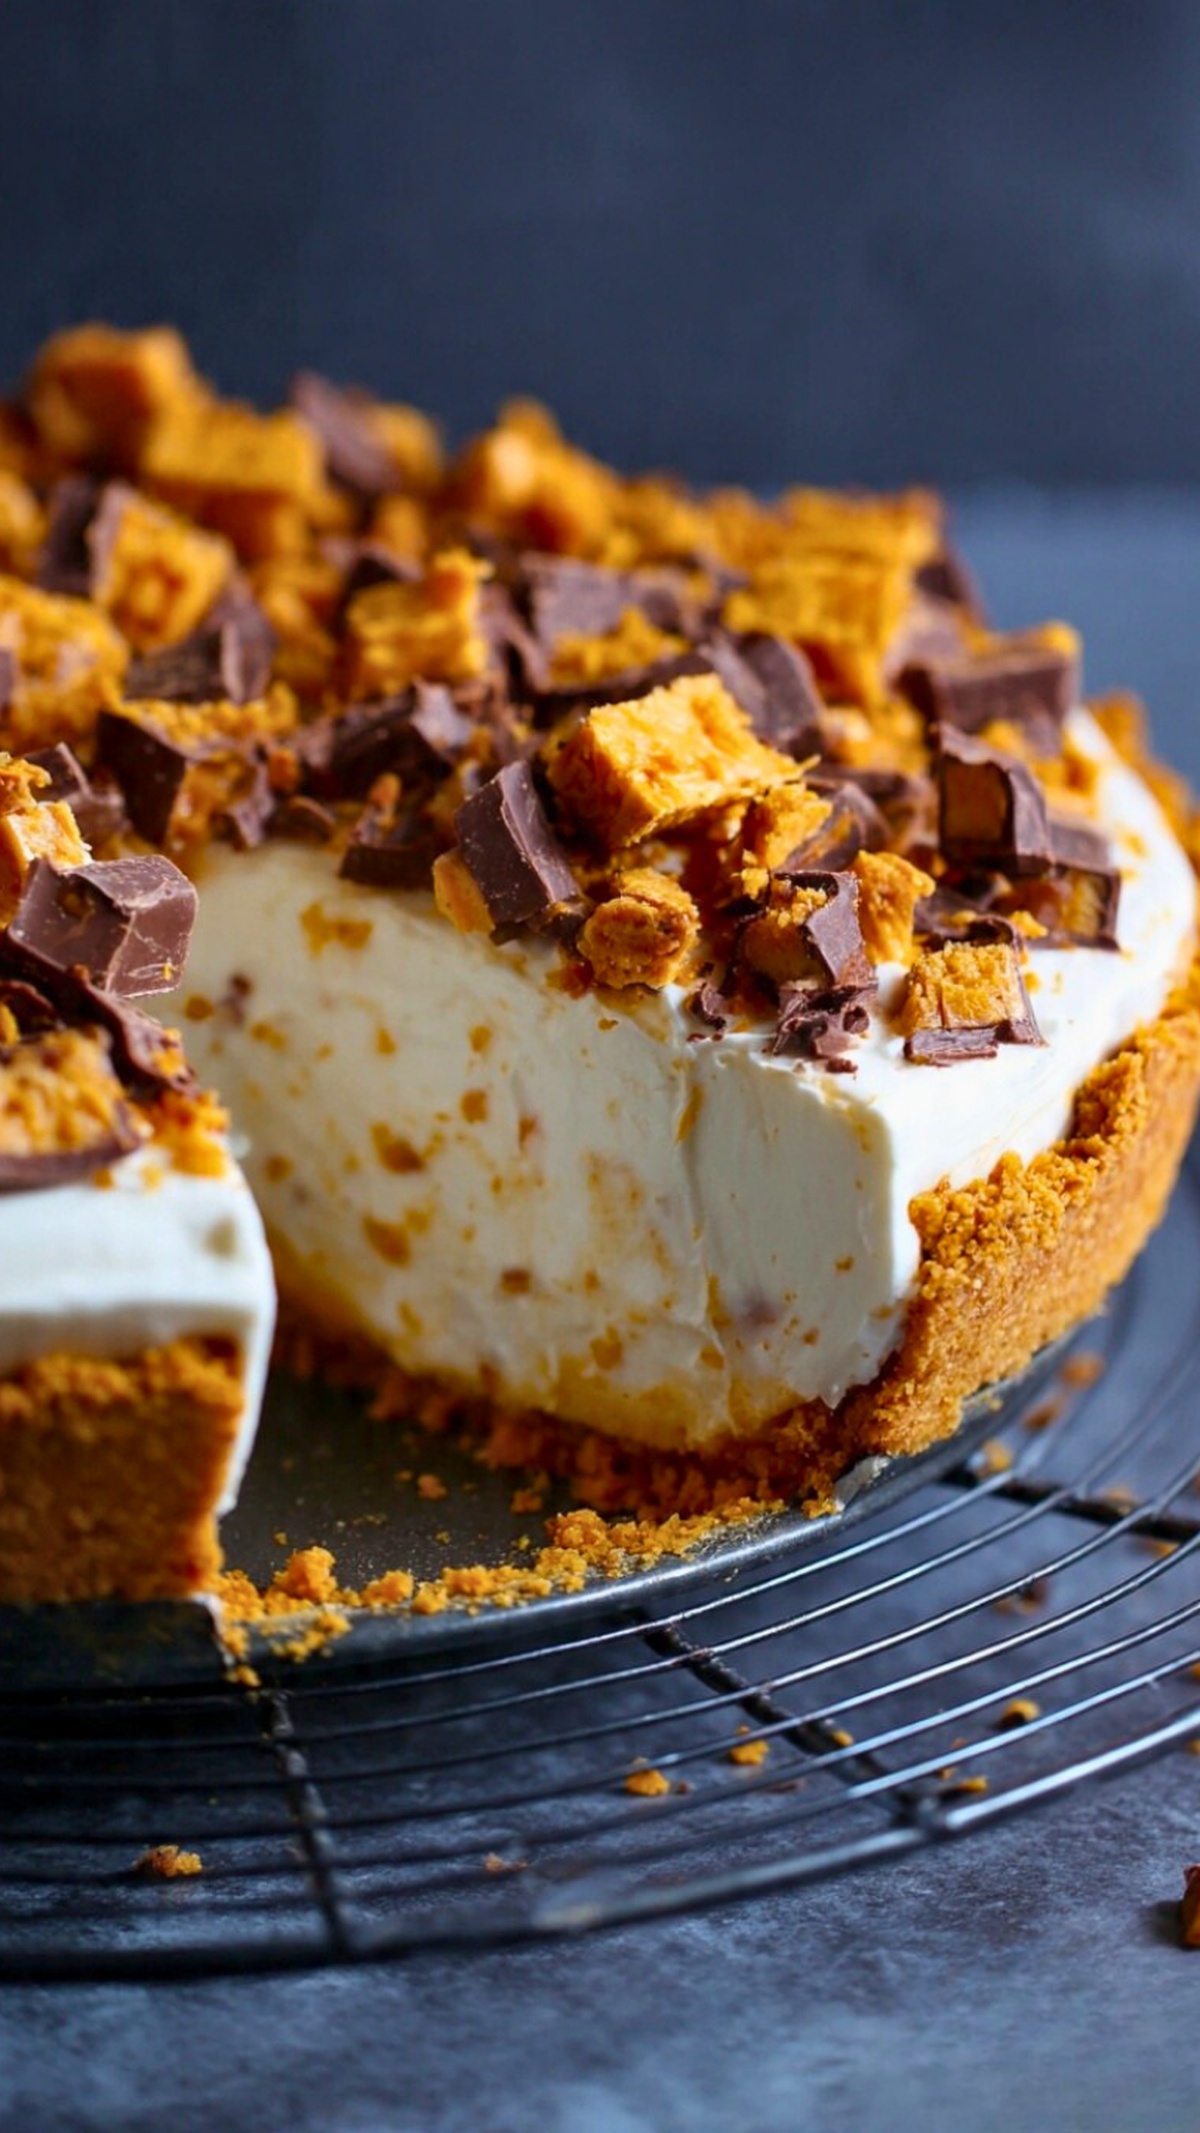
- Top and garnish. Spoon or pipe the whipped cream over the chilled pie, spreading it to the edges or mounding it in the center, depending on how you like it. Sprinkle extra crushed Butterfinger pieces over the top for crunch and a clear visual cue of what’s inside.
- Serve and store. Slice with a sharp knife, wiping the blade between cuts for neat slices. Cover any leftover pie tightly with plastic wrap and store in the fridge. For the best texture, enjoy within 3 days.
Oreo Crust Shortcuts
If you’re short on time, you can use a store-bought chocolate cookie crust, but a homemade Oreo base gives better thickness and flavor. When making your own, there’s no need to remove the cream filling; it actually helps bind the crumbs with less butter. If you don’t have a food processor, seal the cookies in a sturdy bag and crush them with a rolling pin until very fine. Large chunks will make slicing messy, so take an extra minute to break them down. You can also press the crust into the pan and freeze it for 15 minutes instead of refrigerating if you’re in a rush.
Swaps for Cool Whip
If you prefer not to use Cool Whip, you can swap in homemade whipped cream. Whip 1 cup of cold heavy cream with 2–3 tablespoons powdered sugar until it reaches soft-to-medium peaks, then gently fold it into the cream cheese mixture. Don’t overwhip, or it will turn grainy and be harder to fold in smoothly. Keep in mind that real whipped cream is a bit less stable than Cool Whip, so the filling will be slightly softer and best eaten within a day or two. For a middle-ground option, use a natural whipped topping from the refrigerated section if your store carries one.
Make-Ahead and Storage
This Butterfinger Pie is easy to work into your schedule because most of the work happens ahead of time. You can fully assemble the crust and filling up to 24 hours in advance; just keep it tightly covered in the fridge. For the best texture, add the whipped cream topping the day you plan to serve, ideally within a few hours of eating. Leftovers should stay covered and refrigerated, and are best within 2–3 days. If you need to make it even further ahead, you can freeze the pie (without the whipped cream topping) for up to one month. Thaw it overnight in the fridge before topping and serving.
What People Usually Ask
Can I make this Butterfinger Pie without a mixer?
You can make this pie without an electric mixer, but it takes a bit more effort. The key is to start with very soft cream cheese; let it sit at room temperature until it’s easy to mash with a spoon. Beat the cream cheese, powdered sugar, and peanut butter vigorously with a sturdy whisk or spatula until completely smooth. For the filling, folding in the Cool Whip and Butterfingers by hand works fine. The only place a mixer really helps is whipping the cream; without it, use a large whisk and a chilled bowl and be prepared to whisk steadily for several minutes.
Why does my crust sometimes crumble when I slice the pie?
A crumbly crust usually means the crumbs weren’t packed firmly enough or the ratio of butter to crumbs was off. Make sure the Oreo crumbs are very fine and mixed thoroughly with the melted butter so there are no dry pockets. When pressing into the pan, use a flat-bottomed measuring cup and press firmly over the bottom and up the sides. Chilling the crust for at least 30 minutes also helps it set. If your kitchen is warm, you can briefly freeze the crust before filling to give it extra structure, which makes cleaner slices.
How do I keep the filling from getting too soft at room temperature?
This pie is meant to be served chilled, so temperature control matters. Make sure you give it enough time in the fridge — at least 4 hours, but closer to 6–8 if you want very firm slices. The cream cheese needs that time to set up. When serving, only keep the pie out at room temperature for about 1–1.5 hours. If it’s a hot day, return it to the fridge between servings. Using full-fat cream cheese and peanut butter, not reduced-fat versions, also helps the filling stay thicker and more stable.
Butterfinger Pie
Equipment
- Food processor or blender
- Large mixing bowl
- Electric mixer
- 9- or 10-inch pie pan
- measuring cup
- Metal or glass mixing bowl (for whipping cream)
Ingredients
Oreo Crust:
- 36 count Oreos about a 14.3 oz package
- 7 Tbsp unsalted butter melted
Filling:
- 8 oz cream cheese softened
- 1/2 cup creamy peanut butter
- 1 cup powdered sugar
- 16 bars Fun Size Butterfinger bars crushed (about 2 cups)
- 8 oz Cool Whip thawed
Whipped Cream Topping:
- 1 cup heavy whipping cream
- 1/4 cup powdered sugar
- 1 teaspoon vanilla extract
Instructions
Oreo Crust:
- Place the Oreos (cookies and filling) in a food processor or blender and pulse until they become fine crumbs.
- Combine the cookie crumbs with the melted butter in a bowl, press the mixture evenly into the bottom and up the sides of a 9- or 10-inch pie pan, and press firmly (use the bottom of a measuring cup to compact). Chill the crust in the refrigerator while you prepare the filling.
Filling:
- In a large bowl, beat the softened cream cheese, powdered sugar, and peanut butter with an electric mixer until the mixture is smooth and uniform.
- Fold in the crushed Butterfinger pieces and the thawed Cool Whip, mixing on low just until everything is evenly combined.
- Spread the filling over the chilled Oreo crust, smooth the top, cover the pie with plastic wrap, and refrigerate for 4 to 8 hours to set.
Whipped Cream Topping:
- Put a metal or glass mixing bowl and the beaters in the freezer for about 15 minutes to chill—this helps the cream whip faster and hold peaks.
- Remove the chilled bowl, add the heavy cream, powdered sugar, and vanilla, then whip with an electric mixer for about 4–5 minutes or until stiff peaks form and the cream holds its shape.
- Spoon or pipe the whipped cream over the set pie and sprinkle additional crushed Butterfinger pieces on top for garnish.
- Store any leftovers covered in plastic wrap in the refrigerator.